






Ojos e iluminación LED: efectos, estándares, soluciones
Eyes and lighting: consequences, regulations and solutions
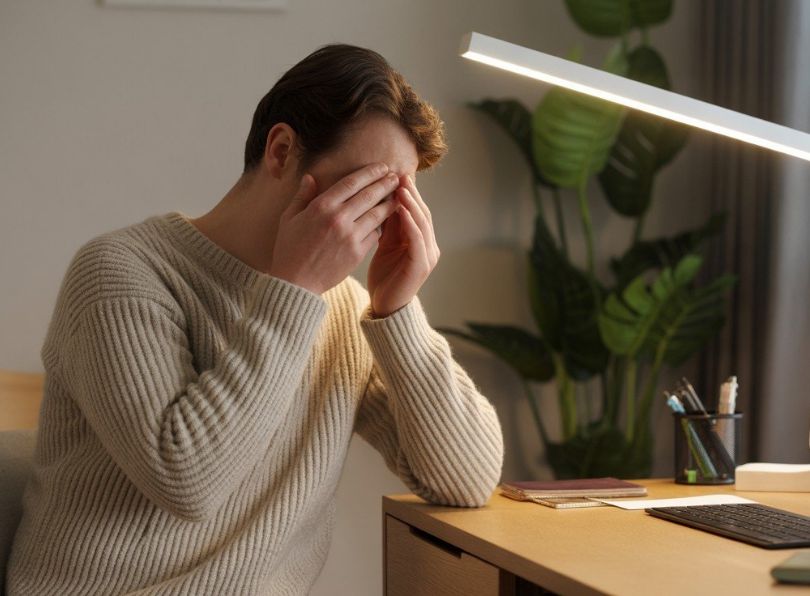
Poor quality artificial lighting does not cause blindness, but it does cause eye strain, headaches, dry eyes and a drop in productivity. The four parameters that determine eye comfort are illuminance (lux), absence of flicker, glare control (UGR ≤ 19) and colour rendering (CRI ≥ 90). Correcting them eliminates most visual disturbances in indoor environments.
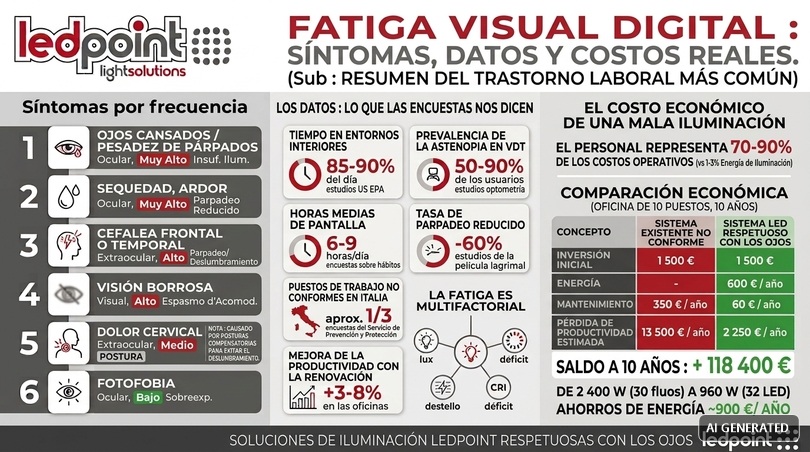
We spend between 85% and 90% of our lives indoors. This means that the eyes of a European adult receive, over the course of a year, much more artificial light than sunlight: we are talking about about 5,000 hours in front of sources designed by someone else, often choosing the cheapest product on the shelf. Yet the human visual system has evolved over two million years under a continuous solar spectrum, with gradual transitions in intensity and colour temperature, and with flicker strictly equal to zero.
The result of this mismatch is not an acute pathology, and this is precisely what makes it insidious. It is a daily tax paid in burning eyes at five in the afternoon, in frontal headaches attributed to stress, in reading errors, in sleep that does not come. One study after another shows that between 50% and 90% of those who work in front of a screen report at least one symptom of digital eye strain, and that a significant part of these symptoms do not depend on the screen but on the light that is around the screen.
This guide is written to understand the mechanism and be able to solve it. The first half contains physiology, epidemiological data, regulatory parameters and units of measurement explained without shortcuts. The second contains the design method, technical criteria for choosing components, environment-by-environment solutions, the most frequent errors, internal Ledpoint laboratory tests and an operational checklist. At the end of the article, it will be possible to read a technical data sheet and understand, in thirty seconds, whether that light source will work for or against eye wellbeing.
In this article...
1. How light enters the eye: essential anatomy and physiology
To understand why a three-euro light bulb can give you a headache and a well-designed LED profile does not, we have to start with the hardware. The human eye is not a passive camera: it is an active optical system that continuously regulates aperture, focus and sensitivity, and each regulation has a metabolic cost. When the luminous environment is unstable, uneven or spectrally poor, that cost accumulates.
In this section we reconstruct the path of light from the cornea to the visual cortex, identifying exactly the points where poor lighting introduces fatigue. You don't need a degree in optometry: you need five concepts, and we'll see them one by one.
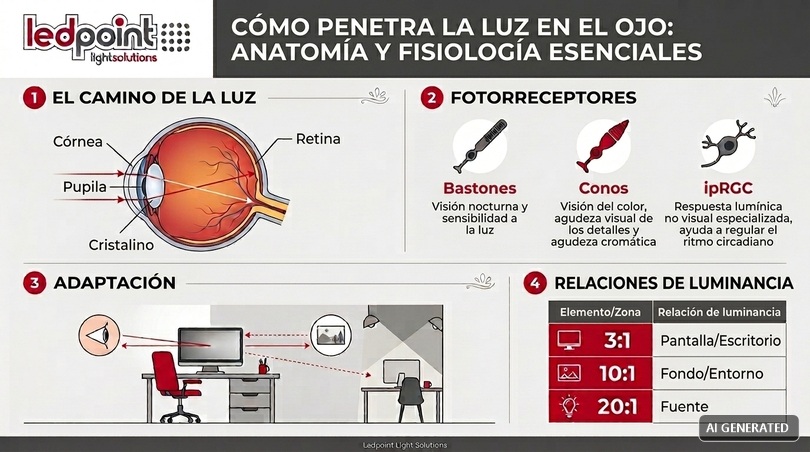
The path of light: cornea, pupil, lens, retina
Light passes sequentially through four structures before becoming a nerve signal. Each of these structures is a potential point of fatigue if the ambient lighting is wrong.
The cornea is the first lens: it provides about two-thirds of the eye's total refractive power (roughly 40 of the 60 total dioptres). It is avascular and is nourished largely by the tear film. Here the first environmental effect comes into play: when we fix a screen or a demanding visual task, the blink rate drops from about 15-20 blinks per minute to 5-7. The tear film evaporates, the corneal surface dries in patches and the optical quality worsens. The feeling of "burning eyes" at the end of the day is in most cases a problem of the tear film, not the retina.
The pupil is the diaphragm. Its diameter varies between about 2 mm in full light and 8 mm in the dark, an area ratio of about 1:16. The pupillary reflex is rapid (fractions of a second) but not free: it is governed by two antagonistic iris muscles, the sphincter and the dilator. An environment with strong luminous unevenness forces the pupil to oscillate continuously, a phenomenon called "pupillary instability" which is one of the documented mechanical causes of the feeling of eye fatigue.
The lens is the variable focus lens. It changes shape thanks to the ciliary muscle to focus on nearby objects: this is the process of accommodation. Looking at a screen at 50 cm requires about 2 dioptres of sustained accommodation; maintaining it for eight hours is the visual equivalent of holding a weight with an outstretched arm. When lighting is poor, the visual system loses depth of field and accommodation must work with greater precision, further increasing the load.
The retina converts photons into electrical impulses. It is here that the type of light, and not just the quantity, begins to matter.
Cones, rods and photosensitive ganglion cells
The human retina contains three families of photoreceptors, and the third was discovered only in the late 1990s. Understanding who does what explains why the same amount of lux can be comfortable at 10 am and harmful at 11 pm.
Rods: scotopic vision
There are about 120 million of them, distributed mainly in the peripheral retina. They contain rhodopsin, are extremely sensitive (they respond even to single photons) but do not distinguish colours and saturate rapidly. They govern night vision and the perception of peripheral movement. Their peak sensitivity is at 507 nm, in the green-blue: this is why at dusk cool colours seem brighter than reds (the Purkinje effect). An environment illuminated at 50-100 lux is a "mesopic" condition, in which cones and rods work together inefficiently: this is the worst condition for prolonged reading.
Cones: photopic and colour vision
There are about 6 million of them, concentrated in the fovea (the 1.5 mm area at the centre of the macula responsible for detailed vision). They are divided into three types based on the photopigment: S cones (peak at 420-440 nm, blue), M cones (534-545 nm, green) and L cones (564-580 nm, red). The brain reconstructs colour by comparing the relative responses of the three types.
Here lies the technical crux of colour rendering: if the source spectrum has deep holes in some bands, the three channels receive an unnatural signal ratio and the visual cortex has to work to interpret the scene. It is not a subjective sensation: it is an additional processing load that translates into longer reaction times and a perception of fatigue.
Intrinsically photosensitive retinal ganglion cells (ipRGCs)
They are less than 1% of retinal ganglion cells, contain melanopsin and have their peak sensitivity around 480 nm (blue-cyan). They do not contribute to image formation: they project to the suprachiasmatic nucleus of the hypothalamus, the central biological clock, and regulate melatonin secretion, body temperature, alertness and mood.
This is the discovery that has changed modern lighting technology: light is not only needed to see, it is needed to regulate the body. Hence the concept of Human Centric Lighting, the melanopic metric (m-EDI, melanopic Equivalent Daylight Illuminance, defined by the CIE S 026 standard) and the international recommendations suggesting at least 250 melanopic lux on the eye during the day and less than 10 melanopic lux in the three hours before sleeping.
| Receptor | Number | Spectral peak | Function | Design implication |
|---|---|---|---|---|
| Rods | ~120 million | 507 nm | Night vision, peripheral movement | Avoid mesopic levels (50-150 lux) for prolonged tasks |
| S / M / L cones | ~6 million | 420-440 / 534-545 / 564-580 nm | Detail and colour | Need continuous spectrum: CRI ≥ 90, R9 ≥ 50 |
| ipRGC (melanopsin) | < 1% of RGCs | 480 nm | Circadian rhythm, alertness, melatonin | High CCT during the day, ≤ 2700 K and dimming in the evening |
Accommodation and adaptation: the two processes that get tired
There are two distinct regulatory mechanisms, often confused with each other, and both are directly influenced by the quality of the ambient lighting. Distinguishing them is useful because they require different countermeasures.
Accommodation is focusing: it depends on the ciliary muscle and concerns distance. It gets tired when the task is close and prolonged, and worsens with age (presbyopia, which typically begins around age 42-45). Adequate illuminance reduces pupil diameter, increases depth of field and lightens the accommodative load: this is the physiological reason why more light on the work plane reduces fatigue even for the same task.
Adaptation is the regulation of sensitivity: it involves the pupil, photopigments and retinal circuits, and concerns luminance. Dark adaptation is slow (rods take up to 20-30 minutes for full sensitivity), light adaptation is rapid but not instantaneous. Every time the gaze moves from a screen at 250 cd/m² to a shaded wall at 15 cd/m², the whole system has to readapt. In a working day this can happen thousands of times.
Recommended luminance ratios
The ergonomic literature and lighting guidelines converge on precise ranges. They are simple numbers to remember and verify, and they apply to any visual work station:
| Relationship | Maximum recommended ratio | Practical example |
|---|---|---|
| Task ↔ immediately adjacent surfaces | 3 : 1 | Screen and desk surface |
| Task ↔ remote surfaces in the visual field | 10 : 1 | Screen and back wall |
| Light source ↔ surrounding background | 20 : 1 | Ceiling luminaire and ceiling |
| Brightest point ↔ darkest point in the environment | 40 : 1 | Window and opposite corner |
The single most effective intervention to reduce screen fatigue is to illuminate the wall behind the monitor. It costs little, can be done with one metre of LED strip in a profile, and reduces the screen/background luminance ratio from typical values of 15:1 or 20:1 to values around 4:1.
Why the eye does not "get used" to bad light
There is a widespread belief that after a few weeks, the eyes adapt to any condition. This is only partly true, and it is a dangerous half-truth. What adapts is the subjective perception: we stop consciously noticing the discomfort. The physiological mechanisms, however, continue to work exactly the same way.
The ciliary muscle does not become stronger because the room is dark, and the pupil does not stop oscillating because we have got used to the flicker. Studies on workers exposed to lighting with high modulation show that symptoms (headache, difficulty concentrating) persist even when subjects declare they do not perceive any flicker. Habituation concerns awareness, not the load.
This has an important practical consequence: the absence of complaints is not proof of lighting quality. The only way to know if an environment is visually healthy is to measure it, and the parameters to measure are those we see in the next sections.
2. Digital eye strain: symptoms, data and real costs
The Computer Vision Syndrome (now more often called Digital Eye Strain or digital asthenopia) is the most widespread occupational disorder in the contemporary working world, and at the same time the most underestimated. It does not appear in accident statistics, it does not produce medical certificates, it does not have a specific and universally adopted ICD code. It exists only in the sum of millions of small daily renunciations.
In this section we put together the available numbers: prevalence, symptoms in order of frequency, correlation with lighting parameters and an estimate of the economic impact. These are the data needed by those who have to justify a budget for lighting requalification, both in the company and at home.
Symptoms in order of frequency
Digital asthenopia presents with a cluster of symptoms that are divided into three categories: ocular, visual and extra-ocular. The distinguishing feature is that they appear after a period of visual work and regress, at least partially, with rest or at the weekend. If a symptom is also present upon waking after a day of rest, it most likely has another origin and deserves an ophthalmological examination.
| Symptom | Category | Indicative frequency among VDT workers | Prevalent lighting cause |
|---|---|---|---|
| Tired eyes / heavy eyelids | Ocular | Very high | Insufficient illuminance, excessive contrast |
| Dryness, burning, gritty sensation | Ocular | Very high | Reduced blinking, dry air, glare |
| Frontal or temporal headache | Extra-ocular | High | Flicker, direct glare, high UGR |
| Transient blurred vision | Visual | High | Accommodative spasm from poor illuminance |
| Difficulty refocusing near/far | Visual | Medium | Sustained accommodation without breaks |
| Reflex tearing | Ocular | Medium | Reflected glare on screen or glossy surface |
| Neck and shoulder pain | Extra-ocular | Medium | Compensatory postures to avoid reflections |
| Transient diplopia | Visual | Low | Convergence insufficiency aggravated by low light |
| Photophobia / light intolerance | Ocular | Low | Overexposure to unshielded high-luminance sources |
Neck pain deserves a special mention because almost no one links it to light. When a reflection disturbs the view of the screen, the body unconsciously reacts by moving the head a few degrees to eliminate it. That position, maintained for hours, produces muscle tension. Eliminating the reflection — by rotating the screen, shielding the luminaire or switching to indirect lighting — often solves a problem that was being treated with anti-inflammatories.
The data: what surveys say
The scientific literature and industry surveys converge on a coherent picture, although percentages vary greatly depending on the definition of case adopted and the population studied. We report here the most recurring values, with the caveat that these are ranges and not physical constants.
| Indicator | Indicative value | Typical source |
|---|---|---|
| Time spent indoors | 85-90% of the day | Environmental exposure studies (US EPA and European equivalents) |
| Prevalence of at least one symptom of digital asthenopia among VDT users | 50-90% | Systematic reviews in optometric field |
| Average daily hours in front of screens (adults, overall use) | 6-9 hours | Digital habits surveys |
| Reduction in blink rate during VDT use | About -60% | Tear film studies |
| Proportion of Italian workstations not conforming to the 500 lux standard | Estimated at around one third | Lighting surveys in RSPP (workplace safety) context |
| Increase in myopia prevalence in urban youth cohorts | Marked growth in the last 30 years | International epidemiological studies on myopia |
| Productivity improvement associated with lighting requalification | 3-8% in controlled office studies | Research on comfort and performance |
The most interesting data point is not any of these taken individually, but their combination. A worker who spends eight hours in an office at 300 lux instead of 500, with luminaires flickering at 30% modulation and a CRI of 78, accumulates a comfort deficit that no single parameter would explain alone. Fatigue is multifactorial, and this is also why partial interventions produce disappointing results.
The economic cost of wrong lighting
In an office budget, electricity for lighting typically accounts for between 1% and 3% of total operating costs. Staff accounts for between 70% and 90%. This simple ratio makes it clear why saving on lighting at the expense of visual comfort is, from a purely economic point of view, an irrational choice.
The order of magnitude calculation
Consider an office with ten workstations. Assume an average company cost per employee of 45,000 euros per year, for a total of 450,000 euros. A 3% loss of productivity due to visual fatigue, additional unscheduled breaks and a higher error rate is worth 13,500 euros per year. The complete lighting requalification of that same office, with quality linear LED luminaires, flicker-free drivers, glare control and regulation, typically costs between 3,000 and 8,000 euros, with a useful life of ten years or more.
Add energy savings. Replacing 30 4x18 W fluorescent luminaires (about 80 W real each with ballast) with 32 W LED luminaires means going from 2,400 W to 960 W. Over 2,500 annual hours of operation and with a cost of 0.25 €/kWh, the saving is about 900 euros per year in energy alone, to which are added the reduction in maintenance and the thermal load on air conditioning.
| Item | Existing poor system | Eye-friendly LED system | 10-year difference |
|---|---|---|---|
| Initial investment | 0 € | 6,000 € | -6,000 € |
| Energy (2,500 h/year) | 1,500 €/year | 600 €/year | +9,000 € |
| Maintenance and spare parts | 350 €/year | 60 €/year | +2,900 € |
| Estimated productivity loss (3% vs 0.5%) | 13,500 €/year | 2,250 €/year | +112,500 € |
| Balance | +118,400 € |
The "productivity" item is by its nature an estimate and should be taken as an order of magnitude, not as an accounting forecast. But even by completely zeroing it out, the intervention remains in the black by almost 6,000 euros on energy and maintenance savings alone. Visual comfort, in this scenario, comes for free.
3. The 7 lighting factors that stress the eyes
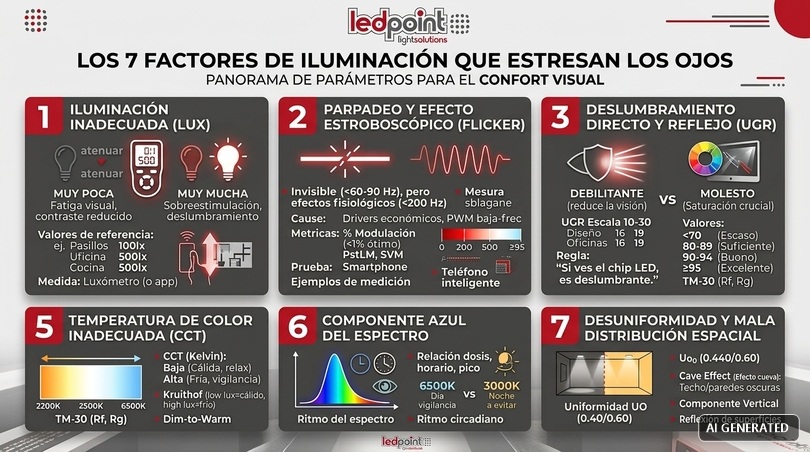
There are seven measurable parameters that determine whether an environment is visually comfortable or tiring. All seven appear, in one form or another, in the technical standards. All seven can be verified with accessible instrumentation or, as a first approximation, with a smartphone and a bit of method. We will address them one by one, explaining the physiological mechanism, the reference value, how to measure it and how to correct it.
Factor 1: inadequate illuminance (too little, or too much)
Illuminance is the amount of light that falls on a surface, measured in lux (lumens per square metre). It is the best-known parameter and, paradoxically, the one most often wrong by default in domestic environments and by excess in shops.
Why little light tires
With low illuminance the pupil dilates, depth of field is reduced and accommodation must be more precise. At the same time, the perceived contrast of the task decreases and the spatial resolution of the visual system worsens. The result is that reading at 150 lux requires about twice the effort from the visual system that it requires at 500 lux, for the same text.
Why too much light tires
Above 1,500-2,000 lux in an indoor environment, without the correlate of a view of the outside, one enters a condition of overstimulation. The risk of glare, reflections on surfaces and energy consumption increase, while the visual benefit is marginal. The comfort curve as a function of lux is not monotonically increasing: it has a plateau and then drops.
| Environment / task | Maintained illuminance (lux) | Minimum uniformity U0 | Notes |
|---|---|---|---|
| Corridors and transit areas | 100 | 0.40 | Avoid abrupt changes with adjacent environments |
| Stairs | 150 | 0.40 | Illuminate the riser, not just the tread |
| Living room, general lighting | 150-300 | 0.40 | Integrate with accent light |
| Bedroom, general | 100-150 | 0.40 | Dimmable down to 20-30 lux in the evening |
| Kitchen, worktop | 500 | 0.60 | Under-cabinet lighting mandatory to avoid shadows |
| Office, writing and reading, VDT | 500 | 0.60 | UNI EN 12464-1 reference |
| Meeting room | 500 | 0.60 | Adjustable for projection |
| Technical drawing | 750 | 0.70 | Dedicated task light |
| Workshop, fine work | 750-1,000 | 0.70 | Beware of the stroboscopic effect |
| Colour inspection and quality control | 1,000 | 0.70 | CRI ≥ 90, CCT ≥ 4,000 K |
| Bathroom, mirror | 500 vertical on the face | — | Side lighting, not from above |
| Children's desk | 500-750 | 0.60 | CRI ≥ 90, flicker-free mandatory |
How to measure it
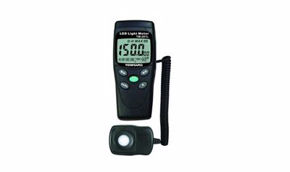
The correct method uses a luxmeter with a sensor corrected for photopic response (class B or higher), placed on the work plane. The practical method uses a smartphone app: the typical error is 15-30%, enough to understand if you are at 200 lux instead of 500, insufficient for a regulatory compliance verification. To correctly design the number of lumens needed, you can follow the example of lux calculation for a specific installation available on our website.
Factor 2: flicker and stroboscopic effect
Flicker is the periodic variation of luminous flux over time. It is by far the most underestimated factor, because in most cases it is not visible to the naked eye yet it produces documented physiological effects. The threshold for conscious perception is around 60-90 Hz, but the visual system continues to respond to modulations up to 200 Hz and beyond, and the visual cortex shows evoked responses even at much higher frequencies.
Where flicker comes from in LEDs
The LED responds to current almost instantaneously, without the thermal persistence that softened the flicker of incandescent lamps. If the current has a ripple, the light reproduces it faithfully. The typical causes are:
- Cheap power supplies with insufficient filtering: the 100 Hz ripple (double the mains frequency at 50 Hz) passes directly into the light.
- Low-frequency PWM dimming: below 1,000 Hz the modulation is 100% deep and becomes problematic especially at low dimming levels.
- Incompatibility between dimmer and driver: a phase-cut dimmer (triac) paired with a driver not designed for that control produces severe flicker and buzzing.
- Undersizing of the driver: when the load is close to or below the minimum operating value, the regulator becomes unstable.
The metrics: percentage modulation, SVM and PstLM
There is not just one number. The metrics that matter are those listed in the following table:
| Metric | What it measures | Optimal value | Acceptable value | Critical value |
|---|---|---|---|---|
| Percentage modulation (flicker percent) | Depth of oscillation | < 1% | < 5% | > 20% |
| PstLM (short-term flicker severity) | Direct perception of flicker | < 0.5 | ≤ 1.0 | > 1.0 |
| SVM (Stroboscopic Visibility Measure) | Stroboscopic effect on moving objects | < 0.4 | ≤ 0.9 | > 1.0 |
| Fundamental frequency | Rhythm of oscillation | > 3,000 Hz or DC | > 1,250 Hz | 100-300 Hz |
The limits PstLM ≤ 1.0 and SVM ≤ 0.9 have entered the European regulatory framework with the Ecodesign Regulation (EU) 2019/2020 for light sources, applicable from September 2021. They are minimum legal limits, not quality targets: for a prolonged work environment or a children's room, aim for modulation below 1%.
The camera test: how to check it in ten seconds
Open your smartphone's camera in video or slow-motion mode, point it at the switched-on source and look at the screen. If dark horizontal bands appear scrolling, there is significant flicker. It is a qualitative test, not quantitative: it does not detect modulations below 5-8% and can give false positives with some cameras. But if the bands are evident and high-contrast, the source should be replaced. A second empirical test is the "pencil test": shake a pencil rapidly under the light; if you see multiple sharp images instead of a continuous trail, there is a stroboscopic effect.
How to fix it
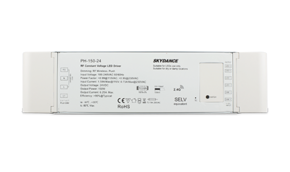
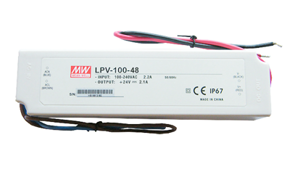
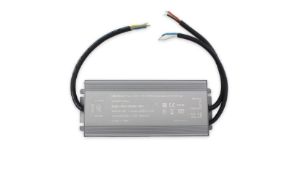
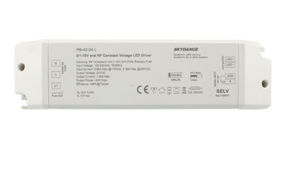
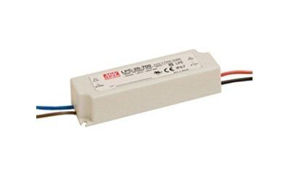
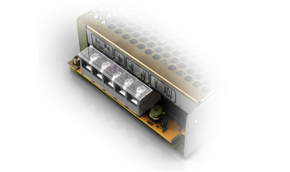
The solution is always upstream, in the power supply. An anti-flicker LED driver with continuous current regulation eliminates the problem at its root; for low-voltage systems, the correct choice is a quality constant voltage power supply with declared ripple. No profile, diffuser or shielding can correct flicker generated by the driver: flickering light remains flickering light, even when diffused.
Factor 3: direct and reflected glare (UGR)
Glare is the condition in which an excessive luminance in the visual field impairs vision or causes discomfort. It is distinguished into two forms that have different causes and remedies.
Disability glare objectively reduces the ability to see: it is the light scattered inside the eye that reduces the contrast of the retinal image. Discomfort glare does not prevent seeing but generates annoyance, tension and, over time, headache. It is this latter that the standard quantifies with the UGR, Unified Glare Rating.
How to read UGR
UGR is a dimensionless index calculated from the luminance of the luminaires, the background luminance, the solid angle and the position in the visual field. The scale typically ranges from 10 (imperceptible) to 30 (intolerable), with steps of 3 units.
| Environment | Maximum UGR | Subjective perception |
|---|---|---|
| Technical drawing, quality control | 16 | Barely perceptible |
| Offices, VDT, classrooms, laboratories | 19 | Perceptible but acceptable |
| Light industry, warehouses with continuous presence | 22 | Perceptible |
| Corridors, automated warehouses | 25 | Annoying but tolerated in transit |
| Outdoor work areas | 28 | Very perceptible |
The most useful practical rule is this: if you can see the individual LED chip switched on, the luminaire is glaring. The luminance of a bare LED chip can exceed 10 million cd/m²; a comfortable surface in the visual field should stay below 3,000 cd/m² for luminaires in view above 65° from the vertical. The difference is three orders of magnitude, and a diffuser bridges it.
Reflected glare: the invisible enemy of the desk
The reflection of a luminaire on a screen or on a glossy surface produces "veiling": the contrast of the text collapses and reading becomes tiring without the user identifying the cause. The most effective countermeasure is geometric: no high-luminance source should be in the "reflection triangle" of the screen, i.e. the ceiling area that the screen "sees" in reflection. In practice: luminaires lateral to the direction of gaze, never frontal above the head, and screens never in front of a window nor with their back to it.
Factor 4: insufficient colour rendering (CRI and R9)
The colour rendering index (CRI, Ra) measures how faithfully a source reproduces colours compared to a reference illuminant. It is calculated by comparing the rendering of eight pastel-coloured samples (R1-R8) and averaging the results on a scale up to 100.
The problem with the average value
CRI Ra is an average of eight soft samples, and averages hide exceptions. There is a ninth sample, R9, which corresponds to saturated red, and it is not included in the Ra calculation: it is possible to have a source with Ra 85 and R9 equal to zero or even negative. That source renders skin tones, wood, food and warm fabrics poorly, and produces that feeling of a "dull" environment that no nameplate data explains.
| CRI (Ra) | Typical R9 | Rating | Suitable applications | Effect on visual load |
|---|---|---|---|---|
| < 70 | < 0 | Insufficient | Technical outdoor lighting | High: colours unrecognisable |
| 70-79 | 0-20 | Poor | Warehouses, garages | Medium-high |
| 80-89 | 10-40 | Sufficient / good | Minimum standard for interiors | Medium |
| 90-94 | 40-70 | Very good | Offices, homes, retail, schools | Low |
| ≥ 95 | > 80 | Excellent | Museums, printing, medical, make-up | Very low |
For living and long-term work environments, the rational choice is an LED strip with CRI ≥ 90, while where the minimum regulatory standard is sufficient, solutions with CRI ≥ 80 remain valid. The premium for CRI 80 to CRI 95 is typically 10-20% on the cost of the strip, which for a domestic installation means a few tens of euros: it is probably the best ratio between cost and perceived benefit of the entire lighting project.
Beyond CRI: TM-30, Rf and Rg
CRI is a 1965 metric based on eight samples. The TM-30-20 method from the Illuminating Engineering Society uses 99 real colour samples and provides two indices: Rf (fidelity, how faithful the colours are, scale 0-100) and Rg (gamut, how saturated they are, with 100 as neutral reference). A source with Rf 90 and Rg 105 renders colours faithfully and slightly more vividly: it is often the preferred combination in preference tests. If a manufacturer declares TM-30 data, it is a good indicator of technical seriousness.
Factor 5: colour temperature unsuitable for the time and task
Correlated colour temperature (CCT), expressed in kelvin, describes the shade of white light: low (2,200-3,000 K) means warm and amber, high (5,000-6,500 K) means cool and bluish. Contrary to intuition, "warm" temperatures correspond to low numbers.
The question "is warm or cool light better?" has no single answer, but it has a precise answer if you specify the time of day and the task. The criterion is twofold: visual performance and circadian alignment.
| CCT | Denomination | Ideal environments | Optimal time of day | Circadian effect |
|---|---|---|---|---|
| 1,800-2,200 K | Amber / candle | Relaxation areas, outdoor night, bedrooms | After 9:00 PM | Negligible melatonin suppression |
| 2,700-3,000 K | Warm white | Living room, bedroom, restaurants, hotels | Evening, 6:00 PM-10:00 PM | Low suppression |
| 3,500-4,000 K | Natural white | Kitchen, bathroom, offices, retail | Day, 8:00 AM-6:00 PM | Moderate, promotes alertness |
| 4,500-5,000 K | Cool white | Laboratories, industry, clinics | Morning and early afternoon | High stimulation |
| 5,500-6,500 K | Daylight | Colour control, warehouses, outdoors | Daytime only | Very high: avoid in the evening |
The Kruithof criterion and why it still matters
In 1941, Dutch researcher Arie Andries Kruithof described an empirical relationship between illuminance and colour temperature perceived as pleasant: at low illuminance levels, warm tones are preferred, at high levels cooler tones. Subsequent studies have reduced its scientific rigour, but the qualitative trend remains valid and useful: a 6,000 K light dimmed to 10% appears unnatural and unpleasant, while the same intensity at 2,200 K appears welcoming. This is why CCT adjustable colour temperature LED strips solve a problem that no fixed-temperature source can solve.
Dim-to-warm: imitating the fire
Traditional incandescent sources, when dimmed, warm the colour: at full power 2,700 K, at 10% about 2,000 K. This behaviour is deeply rooted in our perception because it imitates the fire as evening falls. "Dim-to-warm" LED strips replicate this curve and are the optimal choice for bedrooms, living rooms and restaurants, because the user automatically gets the correct CCT simply by lowering the light, without having to manage a second control.
Factor 6: the blue component of the spectrum
Blue light is the most discussed and most misunderstood topic in the field. We dedicate the entire section 4 to separating facts from commercial exaggerations; here it is enough to anticipate the operational concept: the problem is not the presence of blue in the spectrum, which is essential to have white light, but the relationship between dose, time and spectral peak.
A 6,500 K source contains about twice the energy in the 440-490 nm band compared to a 3,000 K one, for the same lumens. If that source illuminates an office at 10 am, it is an advantage: it supports alertness and anchors the circadian rhythm. If it illuminates a bedroom at 11 pm, it is a problem.
Factor 7: unevenness and poor spatial distribution
The last factor is geometric. Two environments can have the same average illuminance and behave completely differently, because it matters how the light is distributed.
Uniformity U0
Uniformity is the ratio between minimum illuminance and average illuminance over the considered area. The standard requires U0 ≥ 0.60 on the task area and U0 ≥ 0.40 on the immediately surrounding area. A value of 0.25 means that in the worst point there is a quarter of the average light: the eye will have to readapt each time the gaze moves.
The vertical component and the "cave effect"
A system composed only of narrow-beam downward luminaires produces well-lit horizontal planes and dark walls and ceilings. The room appears gloomy, oppressive and smaller: this is the so-called cave effect. The UNI EN 12464-1 standard in the 2021 revision has reinforced precisely this aspect, introducing explicit requirements for cylindrical illuminance and on vertical planes (typically 50-150 lux depending on the environment). Illuminating the walls is not aesthetics: it is the reduction of luminance ratios and therefore comfort.
The role of reflectance coefficients
Surfaces participate in the light balance. The recommended values are: ceiling 0.70-0.90, walls 0.50-0.80, floor 0.20-0.40, work surfaces 0.20-0.60. A dark wall absorbs up to 85% of the light it receives: changing the colour of the walls can be worth as much as adding a luminaire. It is also the reason why indirect lighting only works if the reflection surfaces are light.
4. Blue light: between myth and reality
No lighting topic has generated more marketing and more confusion than blue light. On the one hand, there are alarmist claims about irreversible retinal damage caused by screens; on the other, there are those who dismiss everything as a commercial gimmick. The scientific reality lies in a precise and well-documented position, which is useful to know because it radically changes purchasing choices.
In this section we distinguish two completely different phenomena that common language confuses: the photobiological risk, which concerns possible tissue damage, and the circadian effect, which concerns the regulation of sleep.
Photobiological risk: the IEC/EN 62471 standard
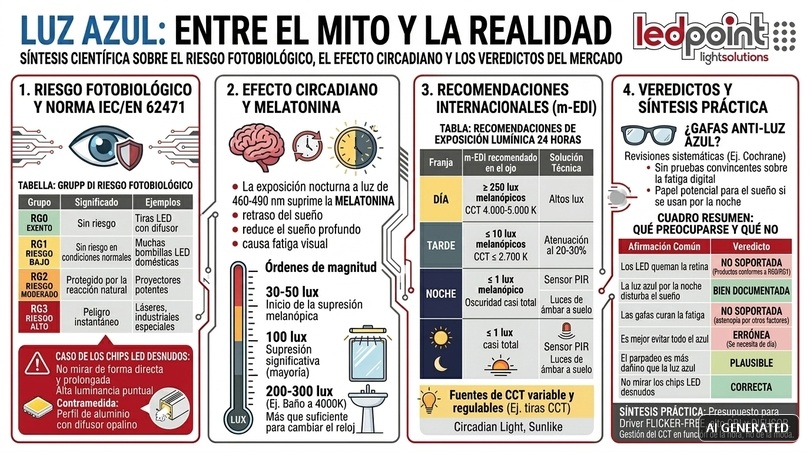
There is an international standard, IEC 62471 / EN 62471, which classifies light sources according to photobiological risk, considering ultraviolet, blue light (blue light hazard, 400-500 nm band) and infrared. The classification provides four groups:
| Group | Denomination | Meaning | Typical examples |
|---|---|---|---|
| RG0 | Exempt | No risk even for prolonged exposure (> 10,000 s) | Low-density LED strips, luminaires with diffuser |
| RG1 | Low risk | No risk under normal use conditions (> 100 s) | Many domestic LED bulbs |
| RG2 | Moderate risk | Protected by the natural aversion to bright light (> 0.25 s) | Powerful projectors, some headlights |
| RG3 | High risk | Dangerous even for instantaneous exposure | Special industrial and medical sources, lasers |
Almost all luminaires for indoor use sold in the European Union belong to RG0 or RG1. For RG2 or higher luminaires, marking is mandatory. In practice, for a domestic or office installation with compliant products, the risk of phototoxic retinal damage from LED lighting is considered negligible by European technical bodies, provided one does not stare directly and for a long time at an unshielded high-luminance source.
The case of bare LED chips
However, there is a precise recommendation: do not look directly and for a prolonged time at high-power LED chips when switched on. Not because they are intrinsically toxic, but because their point luminance is extremely high and concentrates energy on a small retinal area. It is the same logic as not staring at the sun. The countermeasure is trivial and coincides with that for glare: aluminium profile with opal diffuser. A diffuser reduces the peak luminance by one or two orders of magnitude by distributing the same flux over a much larger surface.
The circadian effect: here the problem is real
The second phenomenon is much better documented and is the one that has measurable daily effects. Exposure to light rich in the 460-490 nm band in the evening suppresses melatonin secretion, delays falling asleep, reduces the amount of deep sleep and produces, the next day, tired eyes and reduced concentration.
The orders of magnitude are instructive. Melatonin suppression begins at surprisingly low levels: already 30-50 lux of cool white light on the eye can produce measurable effects in sensitive subjects, and 100 lux produce significant suppression in most people. A 4,000 K ceiling light switched on at 11 pm in the bathroom can produce 200-300 lux on the eye: more than enough to shift the biological clock.
Operational recommendations of the international consensus
A group of researchers in the field published recommendations in 2022 based on the melanopic m-EDI metric, which have become the most cited practical reference:
| Period | Recommended m-EDI on the eye | Practical translation | Technical solution |
|---|---|---|---|
| Day (from wake-up to sunset) | ≥ 250 melanopic lux | Bright environment, better with natural light | CCT 4,000-5,000 K, high lux, vertical component |
| Evening (3 h before sleep) | ≤ 10 melanopic lux | Low and warm light | CCT ≤ 2,700 K, dimming to 20-30% |
| Night (sleep environment) | ≤ 1 melanopic lux | Almost total darkness | Amber courtesy lights at floor level, PIR sensor |
Applying these recommendations does not require exotic technologies. It requires two things: sources with variable colour temperature and the ability to adjust the intensity. Both are available at ordinary costs with CCT LED strips combined with programmable controllers, or with dedicated lines such as Circadian Light and Sunlike, developed specifically to reproduce a spectral trend close to the solar one.
Do "anti-blue light" glasses work?
The question always comes up, and deserves an honest answer. The most recent systematic reviews, including Cochrane ones, have not found convincing evidence that blue-light filtering lenses reduce digital eye strain compared to neutral lenses. The reason is consistent with what we have seen so far: digital asthenopia depends on reduced blinking, sustained accommodation, excessive contrasts and flicker, not on the blue component of the spectrum.
Filtering lenses, however, have a potential role, different: if worn in the evening, they reduce melanopic exposure and can help sleep. It is a chronobiological use, not ergonomic. To put it practically: don't buy yellow glasses to stop having tired eyes at five in the afternoon; fix the office light. Consider them possibly for the two hours before going to sleep.
The summary picture: what to worry about and what not
| Common claim | Verdict | Clarification |
|---|---|---|
| "LEDs burn the retina" | Not supported for compliant products | Indoor luminaires are RG0/RG1 |
| "Blue light in the evening disturbs sleep" | Well documented | Dose-dependent and time-dependent effect |
| "Anti-blue glasses cure eye strain" | Not supported | No proven benefit on asthenopia |
| "Better to avoid blue altogether" | Incorrect | Without blue there is no white light; it is needed during the day |
| "Flicker is more harmful than blue light" | Plausible for daily symptoms | Documented correlation with headache and discomfort |
| "Do not stare at bare LED chips" | Correct | Very high point luminance |
The practical summary: allocate your budget to the flicker-free driver, high CRI and diffuser, not to anti-blue filters. And manage colour temperature according to the time, not fashion.
5. Lux, lumens, watts and candelas: understanding the units of measurement
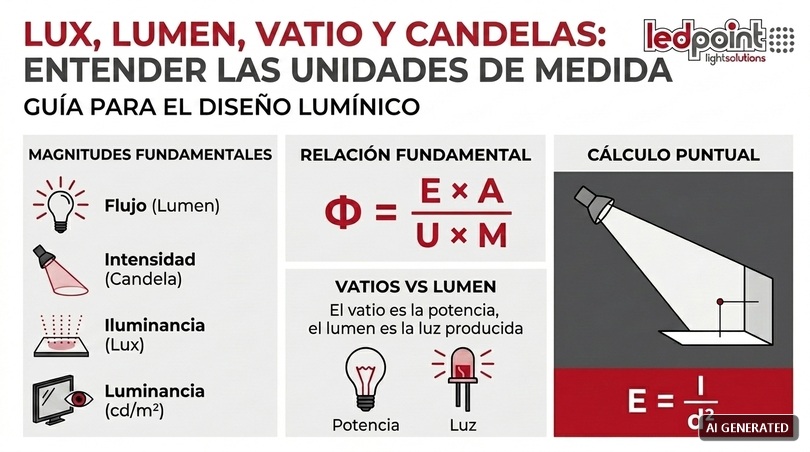
You cannot design, nor buy consciously, without mastering four quantities. They are often used as synonyms in commercial descriptions, and this confusion is the source of a huge share of wrong purchases. The difference between lumens and lux, in particular, is the single notion that separates those who design light from those who buy it at random.
Let's see the definitions, mathematical relationships, practical conversions and calculations that really matter, with complete numerical examples.
The four fundamental quantities
| Quantity | Symbol | Unit | What it describes | Analogy |
|---|---|---|---|---|
| Luminous flux | Φ | lumen (lm) | Total amount of light emitted by the source in all directions | Litres of water coming out of the tap |
| Luminous intensity | I | candela (cd) | Light emitted in a specific direction (per unit solid angle) | Power of the jet in one direction |
| Illuminance | E | lux (lx) = lm/m² | Light that falls on a surface | Litres that wet a square metre of lawn |
| Luminance | L | cd/m² | Light that leaves a surface towards the eye: this is what we see | How bright the surface appears |
The quantity that the eye actually perceives is luminance, not illuminance. A white sheet and a black sheet in the same environment receive the same lux but have very different luminances, because they reflect different fractions of the received light. This is why visual comfort depends as much on the colours of the surfaces as on the luminaires.
From lumens to lux: the fundamental relationship
The basic relationship is simple: E (lux) = Φ (lumens) / A (m²), where A is the illuminated area. But this formula, applied directly, always overestimates the real result, because it does not take into account losses. The correct formula for design is the total flux method:
Φtotal = (E × A) / (U × M)
where:
- E = desired maintained illuminance in lux
- A = area of the work plane in m²
- U = utilisation factor (typically 0.40-0.70 depending on room geometry, reflectances and luminaire distribution)
- M = maintenance factor (typically 0.80 for clean environments, 0.70 for normal environments, 0.60 for dusty environments)
Complete numerical example: 12 m² home office
Target: 500 lux on the desk surface. Room area: 4 m × 3 m = 12 m². Light walls and white ceiling, so U = 0.55. Clean domestic environment, M = 0.80.
Φ = (500 × 12) / (0.55 × 0.80) = 6,000 / 0.44 = 13,636 lumens.
With an LED strip of 1,400 lm/m you need about 9.7 linear metres; with one of 2,000 lm/m, 6.8 are enough. If you had used the naive formula E = Φ/A you would have calculated 6,000 lumens, i.e. less than half of what is needed, obtaining about 220 real lux: the most common mistake of all.
Lumens per square metre: the quick table
For those who want a quick estimate without calculations, here are the installed flux values per square metre that, in typical conditions (medium room, light surfaces, good efficiency luminaires), produce the indicated illuminance.
| Environment | Target lux | Lumens/m² to install | Example: 15 m² room |
|---|---|---|---|
| Bedroom | 100-150 | 250-350 | 3,750-5,250 lm |
| Living room | 150-300 | 350-700 | 5,250-10,500 lm |
| Corridor | 100 | 250 | — |
| Kitchen (general) | 300 | 700 | 10,500 lm |
| Kitchen (worktop) | 500 | 1,100 on the plane only | — |
| Bathroom | 200-300 | 500-700 | — |
| Office / study | 500 | 1,100-1,300 | 16,500-19,500 lm |
| Laboratory, fine work | 750-1,000 | 1,700-2,300 | — |
Watts and lumens: the conversion that still matters
The watt measures the power absorbed, not the light produced. Continuing to buy light "by watt" is a habit inherited from incandescence, when the ratio was almost constant at about 12-14 lm/W. With LEDs, the same watt can produce from 60 to over 200 lumens, depending on the quality of the chip, the operating temperature, the CRI and the driver efficiency.
| Flux (lumens) | Incandescent (W) | Halogen (W) | Compact fluorescent (W) | Typical LED (W) | High efficiency LED (W) |
|---|---|---|---|---|---|
| 250 | 25 | 18 | 6 | 3 | 1.5 |
| 470 | 40 | 28 | 9 | 5 | 2.8 |
| 800 | 60 | 42 | 14 | 8 | 4.5 |
| 1,100 | 75 | 53 | 19 | 11 | 6.5 |
| 1,600 | 100 | 70 | 25 | 15 | 9 |
| 2,500 | 150 | 105 | 38 | 23 | 13 |
Beware of an important commercial detail: the declared efficiency of an LED strip must always be verified on the real flux in lm/m and not on the "chip" value. A correct manufacturer declares the flux of the complete strip at nominal voltage and at operating temperature, not the sum of the nameplate values of the individual LEDs measured at 25 °C in pulse.
The calculation of point illuminance (inverse square law)
For a point source, the illuminance on a perpendicular surface at distance d is:
E = I / d², where I is the intensity in candelas and d the distance in metres.
If the surface is inclined at an angle θ with respect to the perpendicular, the cosine law applies: E = (I × cosθ) / d².
Example: a spotlight with an intensity of 1,200 cd on axis, mounted 2.5 m above a work plane, produces E = 1,200 / 6.25 = 192 lux at the point under the axis. Moving laterally, the illuminance drops rapidly. This is why a system with only spotlights almost always produces insufficient uniformity: coverage requires many closely spaced points, while a linear source solves the problem by construction.
6. Regulations: UNI EN 12464-1, Italian Legislative Decree 81/08, IEC 62471
Protecting eyesight in the workplace is not a matter of common sense: it is the subject of legal obligations and mandatory or reference technical standards. Knowing them serves three categories of people: employers, who are responsible; designers, who must demonstrate compliance; and private individuals, who can use them as a quality benchmark even at home.
This section reconstructs the Italian and European regulatory framework in an orderly manner, distinguishing what is a legal obligation from what is good voluntary practice.
Italian Legislative Decree 81/2008: the legal obligation
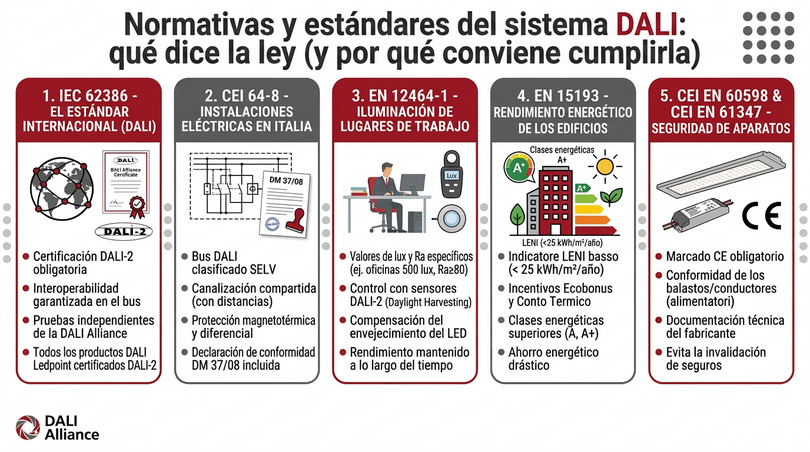
The Consolidated Law on health and safety at work addresses lighting in several points. Annex IV, point 1.10, establishes that workplaces must have sufficient natural light and, in any case, be equipped with devices that allow adequate artificial lighting to safeguard the safety, health and well-being of workers.
Title VII and Annex XXXIV specifically regulate equipment with video terminals, and are the part most directly connected to the theme of this article. In summary, they prescribe that:
- general and specific lighting must guarantee an appropriate illuminance and an adequate contrast between screen and environment;
- glare and reflections on the screen must be avoided, by correctly arranging workstations and light sources;
- windows must be equipped with adjustable cover devices to attenuate daylight;
- health surveillance is provided for with a medical examination including an eye and vision test for those who use a video terminal for at least 20 hours per week.
The crucial regulatory point is that Legislative Decree 81/08 does not directly set the numerical lux values: it refers to the standards of good practice, and the standard of good practice for lighting is UNI EN 12464-1. In inspection and judicial practice, compliance with 12464-1 is the documentary evidence with which compliance with the obligation is demonstrated. You can consult a table of lighting requirements for different work environments for an immediate check.
UNI EN 12464-1: the reference standard for interiors
The standard UNI EN 12464-1 "Light and lighting – Lighting of workplaces – Part 1: Indoor workplaces", in the 2021 revision, is the central technical document. It does not limit itself to prescribing quantities: it defines a coordinated set of quality requirements.
The prescribed parameters
| Parameter | Symbol | Meaning | Typical values for office |
|---|---|---|---|
| Maintained illuminance on the task area | Ēm,task | Minimum average maintained over time | 500 lx |
| Immediately surrounding area illuminance | Ēm,surr | Band of at least 0.5 m around the task | 300 lx |
| Background area illuminance | Ēm,back | Band of at least 3 m around | 100 lx |
| Uniformity | U0 | Emin / Eaverage | ≥ 0.60 on the task |
| Glare limit | UGRL | Unified Glare Rating | ≤ 19 |
| Colour rendering | Ra | Colour Rendering Index | ≥ 80 |
| Cylindrical illuminance | Ēz | Light on vertical planes, perception of faces | ≥ 150 lx (activity spaces) |
| Modelling | — | Ratio between cylindrical and horizontal illuminance | 0.30-0.60 |
| Flicker and stroboscopic effect | — | Must be avoided | PstLM ≤ 1.0; SVM ≤ 0.4 recommended |
What's new in the 2021 revision
The 2021 version introduced three changes that have a direct impact on visual comfort and that many older systems do not meet:
- Flexible "task area" approach: the task area can be defined more precisely, favouring solutions with local task lighting instead of uniformly and unnecessarily illuminating the whole room.
- Reinforced requirements for vertical surfaces and ceiling: minimum illuminance values on walls and ceiling are indicated to counteract the cave effect.
- Modification factors: the standard allows the prescribed levels to be increased in the presence of specific conditions, for example workers over 50, critical visual tasks or high precision requirements. A 60-year-old worker may require up to twice the light of a 20-year-old for the same visual performance.
The last point is probably the most underestimated of all: the light transmission of the lens progressively decreases with age, and at 60 the retina receives about a third of the light it received at 20, with a particularly marked loss in the blue band. An office designed "to standard" for a young population may be insufficient for half of its occupants.
The other standards in the framework
| Reference | Subject | Nature | Relevance for the eyes |
|---|---|---|---|
| Leg. Decree 81/08, Annex IV and XXXIV | Workplace safety, video terminals | Legal obligation | High: illuminance, reflections, health surveillance |
| UNI EN 12464-1:2021 | Indoor workplace lighting | Technical reference standard | Very high: all comfort parameters |
| UNI EN 12464-2 | Outdoor workplaces | Technical standard | Medium: night glare |
| UNI EN 12193 | Sports facility lighting | Technical standard | Medium: stroboscopic effect on fast objects |
| UNI EN 1838 / EN 50172 | Emergency lighting | Legal obligation via fire safety regulations | High in evacuation: dark adaptation |
| EN 17037 | Daylight in buildings | Technical standard | High: daylight factor, view outside |
| IEC/EN 62471 | Photobiological safety of lamps | Harmonised standard | High: blue light hazard risk group |
| EU Reg. 2019/2020 | Ecodesign of light sources | Binding regulation | High: PstLM and SVM limits since 2021 |
| EN 61000-3-2 | Current harmonics | Harmonised standard | Indirect: power quality |
| CIE S 026 | α-optic melanopic metric | International standard | High: circadian effects |
| WELL Building Standard v2 | Health and wellness in buildings | Voluntary certification protocol | Very high: m-EDI, glare, CRI, circadian dynamics |
Beyond the obligation: WELL, Human Centric Lighting and integrated design
Compliance with UNI EN 12464-1 guarantees a compliant environment. It does not guarantee an optimal environment. The difference between "compliant" and "healthy" is exactly the space in which advanced protocols operate.
The WELL Building Standard, in its light-specific feature, requires: minimum melanopic levels measured at eye height, glare control with stricter criteria than the standard, high CRI, access to natural light and the possibility of individual control. This last element (the possibility for the occupant to regulate their own light) is consistently one of the strongest predictors of satisfaction in post-occupancy studies, regardless of the absolute measured values.
Human Centric Lighting translates these principles into dynamic systems that vary intensity and colour temperature throughout the day, reproducing the trend of natural light. It is not a fad: in environments without windows or with poor access to daylight, it is the only way to provide the circadian system with the signal it needs. Implementation requires sources with daylight-type spectrum, CCT control and time programming, today achievable with DALI DT8, ZigBee or 0/1-10V protocols.
7. Designing eye-friendly lighting in 8 steps
This section is an operational method, applicable to both an entire office and a single room, that leads to the implementation of a concrete project with a shopping list.
The method is sequential and each step depends on the previous one. The most common mistake of those who improvise is to start from step 6, i.e. choosing the product, before having defined task, geometry and levels. The result is almost always a system that costs the right amount and works poorly.
Step 1: define the visual task and who performs it
Before any numbers, answer three questions: what is being looked at, for how long, and at what age. Reading a small-print text, soldering electronic components, watching a movie and putting on makeup in front of a mirror are four visual tasks with radically different requirements.
The variables to note are: size of the critical detail, contrast of the detail with the background, continuous duration of the activity, average age of the users, presence of glossy or reflective surfaces, predominant direction of gaze. If the user is over 50 or the task is critical, apply an increase factor: go up one step in the lux scale (from 300 to 500, from 500 to 750).
Step 2: survey the geometry and surfaces
Measure the length, width and height of the room, the height of the work plane (conventionally 0.75 m for desks, 0.85-0.90 m for kitchen worktops) and the position of the windows. Note the colours and materials of the ceiling, walls and floor, estimating the reflectances.
| Surface | Reflectance ρ | Effect on the system |
|---|---|---|
| Pure white matt | 0.80-0.88 | Ideal for ceilings and indirect lighting |
| Warm white / ivory | 0.70-0.80 | Excellent for walls |
| Light grey | 0.50-0.60 | Acceptable |
| Light wood (oak, beech) | 0.35-0.50 | Good for floors |
| Medium grey | 0.30-0.40 | Requires more installed flux |
| Dark wood / walnut | 0.15-0.25 | Absorbs a lot |
| Navy blue, forest green, anthracite | 0.08-0.15 | Requires up to 40% more flux |
| Matt black | 0.03-0.05 | Absorbs almost everything |
Step 3: set the target levels
Define three values, not one: illuminance of the task area, surrounding area and background area. The typical progression is 500 / 300 / 100 lux for an office; 500 / 200 / 100 for a kitchen; 300 / 150 / 75 for a living room with a reading area. Add the vertical illuminance target (100-150 lux on the walls) if you want to avoid the cave effect.
Step 4: choose the distribution strategy
There are four strategies, and in practice a good project combines at least three of them. The key concept is layering: a single type of light cannot satisfy contradictory requirements.
| Strategy | Description | Pros | Cons | Role in visual comfort |
|---|---|---|---|---|
| Direct general | Luminaires illuminating from top to bottom | Efficient, simple | Hard shadows, glare risk, cave effect | Basic, but insufficient alone |
| Indirect general | Light bounced off ceiling and walls | No glare, soft shadows, excellent luminance ratios | Less efficient (30-50% loss), requires light surfaces | The single most effective element |
| Task lighting (functional accent) | Localised light on the task | High efficiency, individual control | Needs adequate general base | Provides the lux where needed without over-illuminating |
| Decorative accent | Highlighting surfaces and objects | Perceived comfort, spatial orientation | No contribution to the task | Reduces monotony, aids adaptation |
Step 5: calculate the flux and distribute it
Apply the total flux method seen in section 5, then distribute the result among the chosen strategies. A typical and effective breakdown for a home office is: 50% indirect general, 35% task, 15% accent. For a kitchen: 45% general, 45% under-cabinet, 10% accent. For a bedroom: 40% general dimmable, 30% reading, 30% night courtesy at very low level.
In the geometric distribution, a practical rule for linear luminaires applies: the spacing between two rows should not exceed 1.2-1.5 times the mounting height above the work plane, otherwise the uniformity drops below 0.60.
Step 6: select the components with the right parameters
Only now do you look at the catalogue. The parameters to check, in order of importance for visual comfort, are nine:
- Flicker: percentage modulation < 5%, ideally < 1%. Depends on the driver, not the strip.
- CRI and R9: Ra ≥ 90 and R9 ≥ 50 for living and working environments.
- Glare control: opal diffuser mandatory if the source is in the visual field.
- Colour temperature and tolerance: binning within 3 SDCM (MacAdam steps) to avoid visible differences between one metre and another.
- Source density and uniformity: high LED density or COB technology to eliminate the dotted effect.
- Dimmability: verify driver-dimmer compatibility and minimum regulation depth (ideally 0.1%).
- Efficiency (lm/W): important for consumption, but to be evaluated after the qualitative parameters.
- L70/L80 durability and colour maintenance: look for at least L80 at 50,000 hours.
- IP rating: IP20 for dry interiors, IP65 or higher for bathrooms, kitchens and outdoors.
If the supplier does not publish data on flicker, R9 and SDCM, those data are almost certainly not good. It is the quickest test to distinguish a professional product from a generic one.
Step 7: design the control
A system without regulation is a system designed for only one condition. The possibility of varying intensity and colour temperature transforms a good system into an excellent one, because it allows the light to be adapted to the time, the activity and the person.
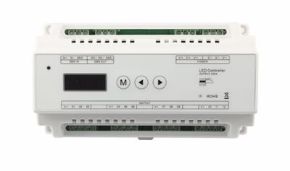
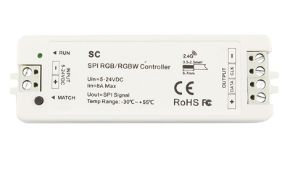
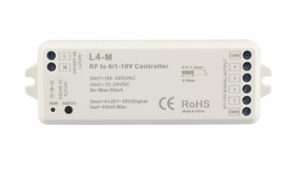
The options, in order of increasing complexity: monochromatic dimmers for simple intensity regulation, CCT controllers for dynamic white, DALI and DMX systems for structured systems and programmable scenarios, presence and light sensors for daylight harvesting that automatically regulates the artificial light according to the available natural light.
Step 8: verify and correct after installation
The last step is the one that is always skipped. Measure the illuminance in at least nine points of the work area grid, calculate the average and uniformity, perform the camera test for flicker, sit in the user's position and verify that no high-luminance source is in the visual field. Then repeat after sunset: many glare problems are invisible during the day because natural light masks them.
Record the values and compare them with the step 3 targets. If the deviation exceeds 20%, something in the calculation or installation needs to be corrected. The check takes half an hour and turns an installation into a qualified project.
8. LED strips, drivers and profiles: the technical solution
LED strips have gone, in the space of fifteen years, from a decorative accessory for shop windows to a primary professional lighting source. The reason is closely linked to the theme of this article: the linear source distributes the same flux over a much larger surface than a point source, and the lower luminance is exactly what is needed to eliminate glare.
But the LED strip is an enormously heterogeneous category, ranging from the three-euro-per-metre product with no technical data to the certified source with documented spectrum. In this section we see exactly what distinguishes an eye-friendly strip, how to choose the driver and why the profile is not an accessory.
Anatomy of a quality LED strip
An LED strip is composed of five elements, and each one affects the final visual comfort.
The printed circuit board (PCB)
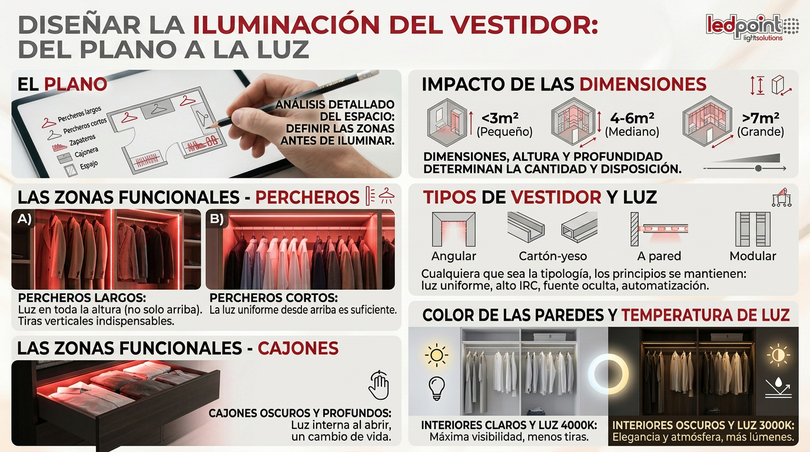
The thickness of the copper (measured in ounces, oz) determines the ability to dissipate heat and the voltage drop along the strip. A PCB with 2 oz or higher copper keeps the LEDs cooler, and a cooler LED better maintains flux and colour over time. The PCB width (8, 10, 12 mm) and the presence of a double layer further affect this. In cheap strips, the copper is 1 oz or less: after three metres the voltage drop produces a visible difference in brightness between the beginning and the end.
The LED chips
The format (SMD 2835, 3014, 2216, 5050, COB) determines the possible density, flux per chip and distribution. Small high-density formats like 2216 allow up to 384 LED/m and more, creating an almost continuous line.
The phosphor and the spectrum
White LED is actually a blue LED coated with phosphors that convert part of the radiation into yellow-red. The quality and composition of the phosphors determine the entire spectrum and therefore the CRI, R9 and the "blue peak". More advanced technologies, such as violet-pumped LEDs from the Sunlike family, use a 405-420 nm chip instead of 450 nm, obtaining a much more continuous spectrum without the marked blue peak typical of conventional LEDs.
Density and protective resin
The density (LED/m) determines the uniformity of the line; the resin or sheath determines the IP rating. Beware: the silicone coating reduces heat dissipation, so a high-power IP65 strip heats up more than the corresponding IP20 and must always be housed in an aluminium profile.
Technical comparison: which strip for which comfort need
| Criterion | SMD 2835 60 LED/m | SMD 2835 120-240 LED/m | SMD 2216 high density | COB | Sunlike / extended spectrum |
|---|---|---|---|---|---|
| Visual uniformity without diffuser | Poor: visible dots | Medium | Good | Excellent: continuous line | Good-excellent |
| Typical available CRI | 80-90 | 80-95 | 90-95 | 90-98 | 95-98 with R9 > 90 |
| Typical flux (lm/m) | 500-900 | 1,200-2,400 | 800-1,600 | 800-2,000 | 700-1,500 |
| Typical efficiency (lm/W) | 90-120 | 90-130 | 90-120 | 80-120 | 70-100 |
| Cutting pitch | About every 5 cm | Every 2.5-5 cm | Every 1-2.5 cm | Every 1-5 cm | Variable |
| Suitable for | Decorative accent, backlighting | General and task lighting | Curves, narrow spaces, furniture | Visible linear lighting, indirect | Living spaces, HCL, quality retail |
| Overall visual comfort | Low without diffuser | Medium-high | High | Very high | Maximum |
For lighting environments in which one stays for a long time, the combination that offers the best visual comfort per euro spent is a COB strip with CRI ≥ 90 in a profile with opal diffuser, powered by a stabilised direct current driver. It is a configuration that simultaneously eliminates dotting, glare and flicker.
The driver: where flicker is born and dies
It is the component on which one saves most often and on which one should never save. The driver determines the flicker, the stability of the flux over time, the compatibility with dimming systems, electrical safety and, to a large extent, the useful life of the entire system.
Constant voltage or constant current?
Traditional 12V, 24V or 48V LED strips require a constant voltage power supply: the strip integrates the limiting resistors. Constant current sources instead require a constant current power supply, more efficient and with less drift. There are also strips with integrated constant current control system, which maintain constant flux along the entire length, eliminating the brightness drop at the end of the run.
Driver parameters that matter for the eyes
| Parameter | Value to look for | Why it matters for the eyes |
|---|---|---|
| Output ripple | < 5% peak-to-peak, ideally < 1% | It is the direct cause of flicker |
| PWM frequency (if dimmable) | > 3,000 Hz, better > 20,000 Hz | Above the physiological response threshold |
| Dimming technology | Analog current (CCR) or high-frequency PWM | CCR eliminates zero modulation |
| Dimming depth | Down to 1% or 0.1% | Necessary for low-intensity evening scenarios |
| Minimum load | As low as possible | Below the minimum, the driver becomes unstable and flickers |
| Power factor | > 0.90 for significant powers | Network quality, less interference |
| Sizing | Load ≤ 80% of rated power | Thermal margin, less drift and longer life |
For systems where you want to eliminate the problem at its root, the correct choice is an anti-flicker 230V driver or, in low voltage, power supplies with declared and certified ripple. The golden rule of sizing: if your installation draws 80 W, choose a power supply of at least 100 W. The 20% margin translates into a lower operating temperature, less ripple and many more years of life.
Dimming: which technology to choose
| Technology | How it works | Flicker risk | Ideal for |
|---|---|---|---|
| Low-frequency PWM (< 1 kHz) | Rapid switching on and off | High | To be avoided in inhabited environments |
| High-frequency PWM (> 3 kHz) | As above, but above the perception threshold | Low | General use, good compromise |
| CCR / analog current dimming | Reduction of direct current | None | Bedrooms, offices, healthcare environments |
| Triac / phase-cut | Partialisation of the mains wave | Medium-high if incompatible | Retrofit on existing 230V systems |
| 0/1-10V | Separate analogue signal | Low | Simple tertiary systems |
| DALI DT6 / DT8 | Bidirectional digital bus | Low | Tertiary, HCL, certified buildings |
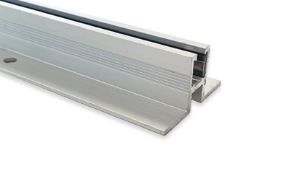
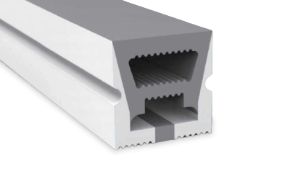
The profile with diffuser: the non-negotiable component
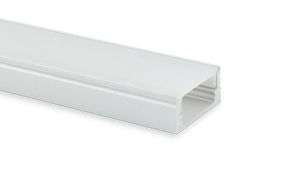
If we had to choose a single accessory to impose on every installation intended for inhabited spaces, it would be the aluminium profile with diffuser. It is not an aesthetic finish: it is the device that transforms a high point-luminance source into a comfortable luminous surface.
The four functions of the profile
- Peak luminance reduction: a bare LED chip can exceed 1,000,000 cd/m². The same flux distributed over a 10 mm wide opal diffuser typically drops below 10,000 cd/m². This is the difference between glaring and comfortable.
- Optical mixing: the diffuser eliminates dotting, merging the individual points into a continuous line. The eye perceives a surface instead of a series of sources, and this reduces micro-pupillary oscillations.
- Heat dissipation: aluminium is a heat sink: it keeps the LED junction at a lower temperature, which means more stable flux, less colour drift and a significantly longer useful life.
- Mechanical protection: it protects the strip from impacts, dust and stress on the contacts.
Choosing the right diffuser
| Diffuser type | Light transmission | Concealment of dots | Recommended application |
|---|---|---|---|
| Transparent | 90-95% | None | Only where the strip is not in the visual field |
| Light satin | 85-90% | Partial | High density or COB, installations not in direct view |
| Standard opal | 75-85% | Good | General use in inhabited environments |
| Deep opal / double layer | 60-75% | Total | Visible luminaires, suspended ceilings, offices |
| Micro-prismatic | 80-88% | Good with beam control | VDT workstations: reduces UGR while maintaining efficiency |
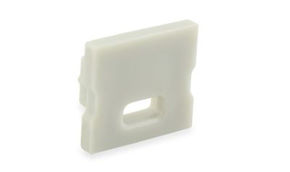
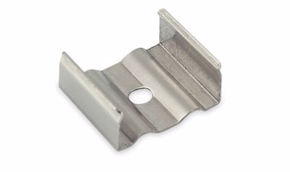
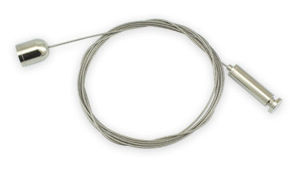
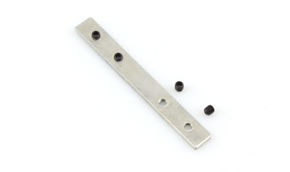
The flux loss introduced by the diffuser must be compensated for during the calculation phase, not suffered. If the diffuser transmits 80%, multiply the required flux by 1.25. It is a marginal cost that buys an enormous gain in comfort. The complete range of profiles, diffusers and profile kits and accessories allows configuring the solution for any geometry: recessed, surface-mounted, suspended, angled, skirting, plasterboard.
9. Environment-by-environment solutions: from the home office to the children's room
The theory becomes useful when it translates into concrete configurations. This section is a recipe book: for each environment you will find the typical visual problem, the numerical targets, the recommended configuration and the components. These are field-tested schemes, not abstract exercises.
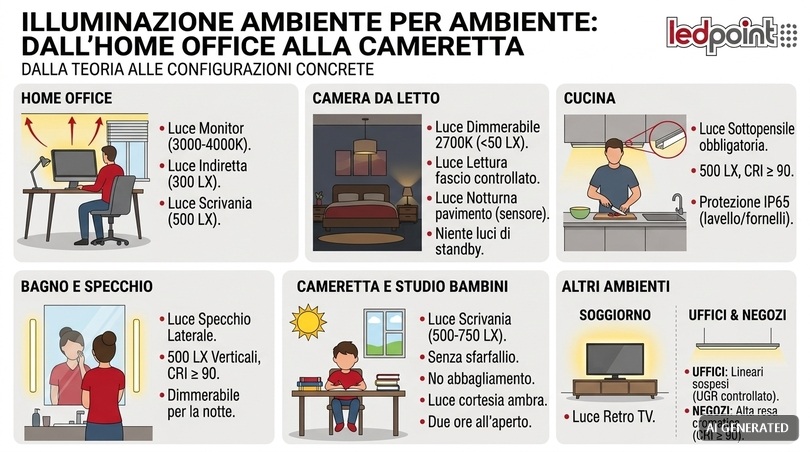
Home office and VDT workstation
It is the environment with the highest visual load and, statistically, the worst lit in Italian homes. The dominant problem is not the quantity of light but the luminance ratio between the screen and the background: a screen at 200-300 cd/m² in front of a wall at 15 cd/m² produces a ratio of 15-20:1 against the recommended 10:1.
The three-layer configuration
Layer 1 – Bias lighting behind the monitor. An LED strip with 700-1,000 lm/m in a profile, mounted behind the screen or on the rear wall, which illuminates the bounce wall. Target: bring the wall luminance to about one third of that of the screen. CCT 4,000 K during the day, 3,000 K in the evening. It is the intervention with the best cost/benefit ratio of the entire guide: one metre of strip, one profile, one power supply.
Layer 2 – Indirect general lighting. High-density or COB strip with CRI ≥ 90 in a ceiling profile or perimeter frame, oriented towards the ceiling. It provides the diffuse base without shadows and without sources in the visual field. Target 300 lux in the environment.
Layer 3 – Task light on the desk. Linear profile under the shelf or orientable desk lamp, positioned on the side opposite the writing hand (on the left for right-handers) to avoid the shadow of the hand. Target 500 lux on the plane, raised to 750 for reading printed documents or for users over 50.
| Layer | Product | Metres / quantity | Flux | CCT | Notes |
|---|---|---|---|---|---|
| Bias lighting | COB strip CRI 90, profile with opal | 1.2 m | ~1,000 lm | 3,000-4,000 K adjustable | Behind the monitor |
| Indirect general | High-density 2835 CRI 90 strip, perimeter profile | 10 m | ~9,000 lm | 4,000 K | Towards the ceiling |
| Task | Under-shelf linear profile with opal | 1.2 m | ~1,600 lm | 4,000 K | Lateral to the gaze |
| Control | CCT controller + 24V power supply | 1 set | — | — | Day/evening scenes |
Geometric rules to respect
- The screen perpendicular to the window, never in front of nor with its back to it.
- No high-luminance luminaire in the "reflection triangle" above and in front of the screen.
- Eye-screen distance 50-70 cm, top edge of the screen at eye level or slightly below.
- The 20-20-20 rule: every 20 minutes, look for 20 seconds at an object about 6 metres (20 feet) away. It relaxes accommodation and reactivates blinking.
Bedroom: the priority is darkness
In the bedroom, the objective is reversed: not to maximise visual performance but to minimise the circadian signal. The bedroom is the only environment where the best light is the one that is not there.
Recommended configuration: general dimmable at 2,700 K with the possibility of dropping below 50 lux; reading in bed with a controlled beam at 200-300 lux on the book and no diffused light towards the partner; night courtesy with a 2,200 K or amber strip at floor level (under the bed or skirting board), activated by a motion sensor and limited to 5-10 lux. This last detail has an enormous practical value: it allows you to get up at night without waking the circadian system and without risking falls, which in the elderly population represent a concrete risk.
Warm light 2200-2700K LED strips are the mandatory choice for this environment. Categorically avoid any source above 3,000 K in the bedroom, including the standby lights of electronic devices: a blue LED from a charger at 30 cm from the face can produce a non-negligible melanopic exposure.
Kitchen: safety first
In the kitchen, the visual task is critical for safety: you handle blades and hot surfaces. The typical problem is the cast shadow: the user's body, illuminated by a ceiling luminaire behind them, casts its own shadow exactly on the work plane.
Solution: mandatory under-cabinet lighting, with a strip in a profile with diffuser, positioned towards the front edge of the cabinet and not against the wall, so that the beam hits the plane in front of the user. Target 500 lux on the plane, CRI ≥ 90 to correctly evaluate food cooking, CCT 3,500-4,000 K. IP65 rating in areas near the sink or hob, or in any case a profile with a closed and easily cleanable diffuser.
Bathroom and mirror: the case of "grooming light"
The mirror is the only point in the house where the visual task is on a vertical plane: the face. This completely changes the required geometry.
The universal mistake is the ceiling spotlight above the mirror, which produces marked shadows on dark circles, nose and chin: the worst possible lighting for shaving, applying makeup or observing one's skin. The correct solution is side lighting: two vertical strips in profile on the sides of the mirror, at face height, with a deep opal diffuser. Alternatively, complete perimeter lighting. Target 500 vertical lux on the face, CRI ≥ 90 with high R9 (essential for evaluating the complexion), CCT 3,000-4,000 K. A mirror dimmer allows the intensity to be reduced for night-time use.
Children's room and study area
It is the environment where the requirements are most stringent, and for two reasons. First: children's lenses are much more transparent than adults' and allow a greater amount of blue light to pass through. Second: the increase in myopia prevalence in young cohorts is correlated, in epidemiological studies, with reduced exposure to natural outdoor light and excessive near work.
Requirements: 500-750 lux on the desk, CRI ≥ 90, flicker-free non-negotiable, no source in the visual field, CCT 4,000 K for studying and 2,700 K in the evening. Add an amber courtesy light for the night. And remember the most effective non-lighting advice of all: two hours outdoors a day have a greater impact on a child's visual health than any lighting system.
Living room and TV area
The living room has contradictory requirements: it must support reading, conversation, TV viewing and relaxation. The solution is layering with scenes. For the TV area, the same principle as for the monitor applies: a strip behind the television that illuminates the wall reduces the luminance ratio and fatigue during prolonged viewing, with a target wall luminance of about 10% of that of the screen and a CCT close to the 6,500 K white point of the television to avoid altering colour perception.
Tertiary and commercial work environments
In open-plan offices, the dominant theme is reflected glare combined with the need for uniformity over large surfaces. The typical solution is the suspended linear luminaire with direct/indirect emission (typically 60/40 or 50/50), which illuminates the ceiling, reducing luminance ratios, and distributes a direct component on the plane with controlled UGR. In retail, the decisive variable is colour rendering: a CRI ≥ 90 with high R9 can radically change product perception, particularly on fresh food, textiles and cosmetics.
10. The 12 most frequent errors that ruin visual comfort
In our experience of technical assistance to installers, designers and private individuals, the same errors repeat with surprising regularity. We have collected them and sorted them by frequency. Recognising even three of them in one's own situation means already having a concrete improvement plan in hand.
For each error we indicate the symptom with which it manifests itself, the technical cause and the correction, so that the section works as a diagnostic tool.
Error 1: buying by watt instead of lumen
The symptom is the systematically underlit environment. The cause is the habit inherited from incandescence. The correction is to think in terms of total installed lumens per square metre, using Table 15 as a quick reference, and always verify the real flux of the strip in lm/m and not the power in W/m.
Error 2: installing the LED strip bare, without a profile
The symptom is discomfort when the strip enters the visual field, combined with the dotted effect on surfaces. The cause is the extreme point luminance of the chips. The correction is always the same: aluminium profile with opal diffuser, which simultaneously solves glare, uniformity, dissipation and durability.
Error 3: saving on the power supply
The symptom is evening headaches without apparent cause, often accompanied by a slight hum. The cause is the high ripple of the driver. The correction is a power supply with declared ripple below 5%, oversized by 20% compared to the load, and in the case of regulation, a driver with current dimming or PWM above 3 kHz.
Error 4: undersizing the power supply
The symptom is sudden switching off after a few minutes, or a progressive decrease in brightness. The cause is operation at the limit with thermal protection that intervenes cyclically. The correction is a 20-30% margin on the rated power, calculated including all line losses.
Error 5: using a single colour temperature for the whole house
The symptom is the "hospital" environment in the evening or the "tavern" one during the day. The cause is the absence of temporal stratification. The correction is to assign the right CCT to each environment and, where one stays for a long time, to adopt CCT adjustable or dim-to-warm strips.
Error 6: ignoring vertical lighting
The symptom is the room that appears gloomy despite the measured lux being correct. The cause is the cave effect: well-lit horizontal planes and dark vertical surfaces. The correction is to add wall washing or an indirect component, bringing the walls to 100-150 lux.
Error 7: positioning the light behind the user
The symptom is the shadow of one's own head or hand on the task, or the reflection on the screen. The cause is purely geometric. The correction is to move the source laterally with respect to the direction of gaze and, for writing, to the side opposite the dominant hand.
Error 8: forgetting the maintenance factor
The symptom is the system that meets the targets on the first day and no longer meets them after three years. The cause is the flux decay combined with the accumulation of dust on the diffusers. The correction is to design with M = 0.80 and clean the diffusers at least once a year: a cleaning can restore 10-15% of the flux.
Error 9: pairing incompatible dimmers and drivers
The symptom is flicker at low levels, flickering at switch-on, humming or the inability to drop below 30%. The cause is the pairing of a phase-cut dimmer with a driver not designed for that control. The correction is to verify the compatibility declared by the manufacturer and, where possible, prefer 0/1-10V, DALI or dedicated controller systems.
Error 10: neglecting colour binning
The symptom is the visible difference in shade between two sections of the same reference strip, or between one order and the next. The cause is the colour tolerance in production. The correction is to choose products with declared binning within 3 SDCM and, for large installations, to purchase all the material in a single batch.
Error 11: installing without heat dissipation
The symptom is the flux drop and the colour shift towards green or yellow over months. The cause is the junction temperature being too high. The correction is the aluminium profile in full contact with the strip, air space around the profile and attention not to bury high-power strips in plasterboard without ventilation.
Error 12: not providing any regulation
The symptom is the system that works well in only one condition and poorly in all others. The cause is the idea that light is an on/off switch. The correction is to plan for dimming from the start: adding it later costs much more, because it often implies replacing drivers and wiring.
| What you feel | Most probable cause | 2-minute check | Correction |
|---|---|---|---|
| Headache at the end of the day | Flicker or glare | Camera test; look if you see the chips | Flicker-free driver; diffuser |
| Burning eyes and dryness | Reduced blinking, dry air | Count the blinks in a minute | 20-20-20 rule, humidification, less contrast |
| Difficulty reading small text | Insufficient illuminance | Luxmeter or app on the plane | Task light 500-750 lux |
| Reflection on the screen | Luminaire in the reflection triangle | Turn off the screen and look into it as in a mirror | Move or shield the source |
| Gloomy room despite the lux | Cave effect, dark surfaces | Measure the lux on a wall | Indirect lighting, wall washing |
| Dull colours, unappetising food | Low CRI, zero R9 | Compare with natural light | Sources with CRI ≥ 90 and R9 ≥ 50 |
| Cannot sleep | Evening melanopic exposure | Look at the CCT of the lights on after 9 PM | ≤ 2,700 K, dimming, dim-to-warm |
| See "dots" on the ceiling | Low-density strip without diffuser | Look at the light line | COB or high density + opal |
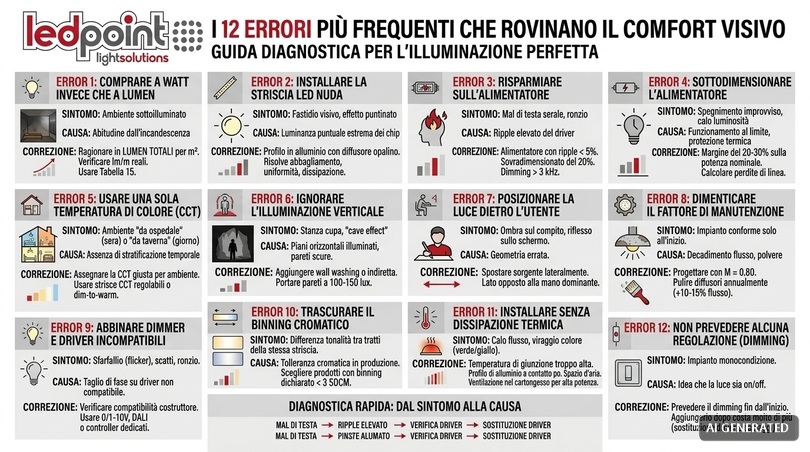
11. Ledpoint laboratory internal tests: what we measured
The normative theory is public; field data are much less so. For this reason, the Ledpoint technical team conducts systematic measurements on catalogue products and market samples, and in this section we share the most useful aggregated results for the reader. These are internal laboratory data, obtained on a bench with photometric instrumentation and oscilloscope, and serve to give verifiable orders of magnitude, not to replace third-party certification.
We have chosen to publish three series of measurements, because they correspond to the three questions we receive most often from the technical service: how much the driver really matters for flicker, how much flux a diffuser loses, and how much a strip heats up with and without a profile.
Test A: percentage modulation as a function of the driver
We powered the same 24V 14.4 W/m LED strip with four different power sources, measuring the modulation of the luminous flux with a photodiode and oscilloscope, at full power and at 20% dimming.
| Power supply | Modulation at 100% | Modulation at 20% | Dominant frequency | Rating |
|---|---|---|---|---|
| Generic unfiltered power supply | ~34% | ~48% | 100 Hz | To be avoided in inhabited environments |
| Standard commercial power supply | ~7% | ~22% | 100 Hz | Acceptable only at full power |
| Quality power supply with filter | < 2% | ~6% | Residual 100 Hz | Good |
| Anti-flicker driver with current dimming | < 1% | < 1% | No significant component | Excellent, suitable for prolonged use |
The most significant data point is the dimming at 20% column: it is the condition in which most domestic systems work in the evening, and it is precisely the one in which cheap power supplies drastically worsen. A product that appears acceptable at full power can become strongly modulated when dimmed. This explains why many users report discomfort especially in the evening, attributing it to accumulated fatigue.
Test B: flux loss and peak luminance reduction by diffuser type
On the same COB CRI 90 strip, we measured flux and peak luminance with four covering configurations, keeping the power supply constant.
| Configuration | Relative flux | Relative peak luminance | Visible dotting | Comfort/efficiency ratio |
|---|---|---|---|---|
| Bare strip | 100% | 100% (reference) | Yes on SMD, no on COB | Unfavourable |
| Profile + transparent diffuser | ~94% | ~92% | Yes on SMD | Poorly favourable |
| Profile + satin diffuser | ~87% | ~28% | Attenuated | Good |
| Profile + opal diffuser | ~80% | ~11% | Absent | Excellent |
| Profile + deep opal | ~68% | ~5% | Absent | Excellent for visible luminaires |
The correct reading of this table is as follows: the opal diffuser costs 20% of the flux and returns a peak luminance reduction of almost a factor of ten. From the point of view of visual comfort, it is one of the most convenient exchanges available in lighting technology: the 20% is compensated by adding an extra metre of strip, and you get a source that does not glare.
Test C: operating temperature with and without profile
We measured the surface temperature of the PCB of a 24V 19.2 W/m strip after 60 minutes of continuous operation at 25 °C ambient, in three mounting configurations.
| Mounting | PCB temperature after 60 min | Expected effect on useful life |
|---|---|---|
| Free strip on plastic surface | ~72 °C | Marked reduction, accelerated colour drift |
| Strip glued on plasterboard | ~65 °C | Significant reduction |
| Strip in recessed aluminium profile | ~48 °C | Nominal life respected |
| Strip in ventilated surface-mounted aluminium profile | ~42 °C | Nominal life or higher |
Every 10 °C less at the junction translates, as an empirical rule widely used in electronics, into a significant extension of the useful life of the components. The aluminium profile is therefore not only an optical device: it is also the insurance on the investment duration and on the stability of the colour over time, which is itself a factor of visual comfort, because a strip that shifts in shade compared to others breaks the harmony of the environment.
What the technical service has taught us
In addition to the bench data, Ledpoint technical assistance collects hundreds of reports each year. The three most frequent causes of declared dissatisfaction do not concern the LED strip, but the surroundings: unsuitable power supply, absence of a profile and underestimation of the flux. It is a statistic that says a lot: the component on which buyers focus their attention is rarely the one that determines the result.
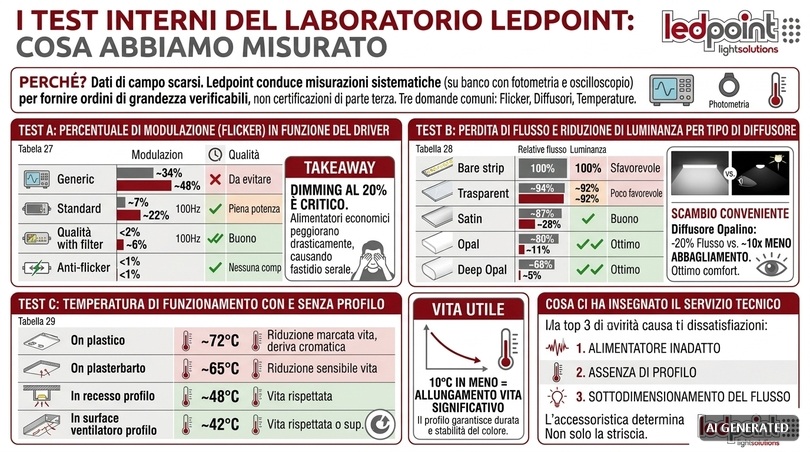
12. Purchase checklist, costs and return on investment
We close the operational part with the practical tools: a checklist to use in front of the technical data sheet, an estimate of realistic costs by type of intervention and a reasoning on the economic return that also takes into account what does not appear on the bill.
The 15-point checklist
Print it, or keep it open while comparing products. If a supplier is unable to answer at least ten of these fifteen points, the product is not suitable for an environment where one stays for a long time.
| # | Check | Acceptable value | Optimal value |
|---|---|---|---|
| 1 | Real flux of the strip | Declared in lm/m at 25 °C | Declared also at operating temperature |
| 2 | Efficiency | ≥ 90 lm/W | ≥ 120 lm/W |
| 3 | CRI Ra | ≥ 80 | ≥ 90 |
| 4 | R9 | > 0 | ≥ 50 |
| 5 | Colour tolerance | ≤ 5 SDCM | ≤ 3 SDCM |
| 6 | Flux modulation (flicker) | < 5% | < 1% |
| 7 | Dimming frequency | > 1,250 Hz | CCR or > 3 kHz |
| 8 | Driver ripple | < 5% | < 1% |
| 9 | PCB copper | 1 oz | ≥ 2 oz |
| 10 | LED density | ≥ 120 LED/m | COB or ≥ 240 LED/m |
| 11 | IP rating suitable for the environment | IP20 dry interiors | IP65 wet areas |
| 12 | Declared life | L70 ≥ 30,000 h | L80 ≥ 50,000 h |
| 13 | Profile and diffuser available | Yes | Complete and coordinated range |
| 14 | Warranty | 2 years | 5 years |
| 15 | Technical documentation (datasheet, curves, IES) | Datasheet | Datasheet + photometric file |
How much an eye-friendly system really costs
The following figures are indicative orders of magnitude for materials, excluding installation and structural works, and serve to give a realistic scale of the investment.
| Intervention | Components | Indicative cost range | Impact on visual comfort |
|---|---|---|---|
| Bias lighting behind monitor | 1.2 m strip + profile + power supply | 40-90 € | Very high |
| Kitchen under-cabinet 3 m | CRI 90 strip + opal profile + driver | 90-200 € | High (comfort and safety) |
| Living room indirect lighting 12 m | Strip + profiles + power supply + dimmer | 350-800 € | High |
| Complete three-layer home office | See Table 25 | 300-700 € | Very high |
| Bedroom with dim-to-warm and night courtesy | CCT strip + controller + sensor | 200-450 € | High (sleep) |
| Bathroom mirror lighting | 2 vertical profiles + CRI 95 IP65 strip | 110-250 € | High |
| Anti-flicker driver upgrade on existing system | Driver only | 40-150 € | Very high |
The two items with the best ratio between cost and benefit are bias lighting and driver replacement: both under 100 euros, both with an immediately perceptible effect. If the budget is limited, start there.
The return on investment: energy, maintenance and well-being
The return on a lighting system consists of three items, of which only the first appears on the bill.
Energy: the saving depends on the technology replaced. Switching from halogen to LED typically saves 80-85% of energy; from fluorescent to LED, 40-55%; from a first-generation LED to a current one, 20-30%. At 0.25 €/kWh, every 100 W eliminated for 2,000 hours a year is worth 50 euros per year.
Maintenance: an L80 source at 50,000 hours, in domestic use of 1,000 hours a year, theoretically lasts fifty years. In practice, what fails is almost always the driver: hence the importance of choosing it well and making it accessible for replacement. A system designed with an inspectable driver has maintenance costs a fraction of one with a driver buried in the false ceiling.
Well-being and productivity: it is the most difficult item to quantify and the largest. Even a prudent estimate, like the one in Table 5, shows that it dominates the other two by one or two orders of magnitude. It is not a marketing argument: it is simply the reflection of the fact that the cost of people's time is much higher than the cost of the energy that illuminates them.
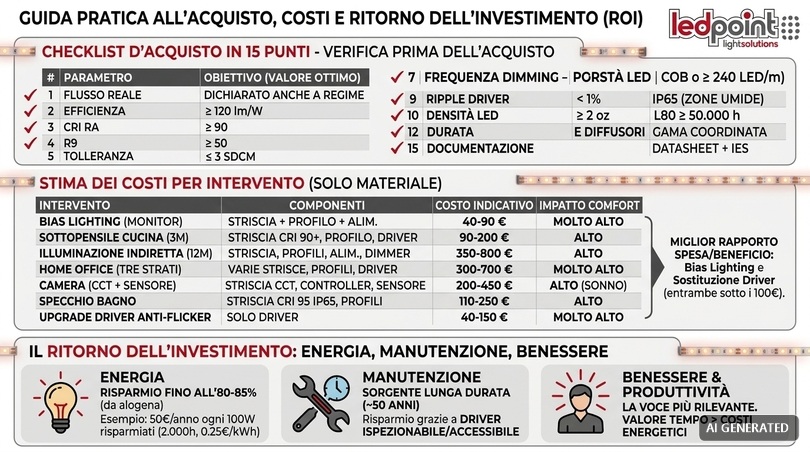
13. Visual comfort glossary
Technical terms appear in all product data sheets and all standards. This glossary collects those useful for evaluating lighting from the point of view of eye health, with short and operational definitions.
| Term | Definition | Why it matters for the eyes |
|---|---|---|
| Accommodation | Change in the shape of the lens to focus | It is the muscle that gets tired in near work |
| Asthenopia | Visual fatigue | The symptom to be prevented |
| Binning | Selection of LEDs by shade and flux | Prevents colour differences between sections |
| Candela (cd) | Luminous intensity in one direction | Basis for point calculation |
| CCT | Correlated colour temperature, in kelvin | Determines the circadian effect and the atmosphere |
| COB | Chip on Board: densely mounted LEDs on a substrate | Continuous light line, no dotting |
| CRI (Ra) | Colour Rendering Index on 8 samples | Below 80, it increases the visual processing load |
| Daylight harvesting | Automatic regulation based on natural light | Keeps lux constant, reduces consumption |
| Dim-to-warm | CCT lowers when dimmed | Imitates incandescence and sunset |
| Stroboscopic effect | Altered perception of moving objects under modulated light | Safety risk with machinery |
| Flicker | Periodic oscillation of the luminous flux | Headache, fatigue, discomfort |
| Illuminance (lux) | Luminous flux per unit area | Basic parameter of every project |
| ipRGC | Photosensitive ganglion cells with melanopsin | Regulate the circadian rhythm |
| L70 / L80 | Hours after which the flux drops to 70% / 80% | Real measure of useful life |
| Luminance (cd/m²) | Light emitted or reflected by a surface towards the eye | This is what the eye actually perceives |
| Lumen (lm) | Total luminous flux | The "quantity of light" produced |
| m-EDI | Melanopic Equivalent Daylight Illuminance | Metric of the circadian effect |
| PWM | Pulse Width Modulation for dimming | If at low frequency it generates flicker |
| R9 | Saturated red rendering | Not included in CRI, but decisive for skin and food |
| Ripple | Residual oscillation of the output voltage | Direct cause of flicker |
| SDCM | MacAdam steps: colour tolerance | ≤ 3 for visual uniformity |
| SVM | Stroboscopic Visibility Measure | Standardised metric for the stroboscopic effect |
| TM-30 (Rf, Rg) | Modern colour evaluation method on 99 samples | More accurate than CRI |
| UGR | Unified Glare Rating | Quantifies discomfort glare |
| Uniformity (U0) | Ratio between minimum and average illuminance | Reduces eye readjustments |
14. Frequently asked questions
We gather here the questions we receive most often from the technical service and from customers, with concise and verifiable answers. Click on each question to read the answer.
Are LEDs bad for the eyes?No, compliant LEDs for indoor use do not damage the eyes. They belong to risk groups RG0 or RG1 of the IEC 62471 standard. The disturbances attributed to LEDs almost always derive from flicker, glare from unshielded chips or poor colour rendering, all defects that can be solved with a quality driver and diffuser. |
How many lux are needed to read or study without straining the eyes?500 lux on the work plane are needed for ordinary reading and writing, rising to 750 lux for small text, technical drawing or users over 50. The value must be measured on the plane, not on the ceiling, and accompanied by background lighting of at least 100-150 lux. |
Is warm or cool light better for the eyes?It depends on the time and task. During the day and for activities that require concentration, neutral light at 4,000 K is preferable; from the evening onwards, warm light at 2,700 K or lower, dimmed, should be used. The optimal solution is a CCT adjustable source that follows the daily trend. |
How do I know if a lamp has flicker?Point your smartphone's camera in video or slow-motion mode at the switched-on source: if dark scrolling bands appear, there is significant flicker. Alternatively, shake a pencil rapidly under the light: if you see multiple sharp images instead of a continuous trail, there is a stroboscopic effect. |
What is the difference between lumens and lux?The lumen measures the total light emitted by the source; the lux measures the light that falls on one square metre of surface. One lux equals one lumen per square metre. In practice, you buy lumens and design lux: the conversion requires considering area, reflectances and maintenance factor. |
Is CRI 90 really worth the premium over CRI 80?Yes, in environments where one spends a lot of time. The premium is typically 10-20% on the cost of the strip, while the perceptual gain is immediate: natural colours, correct skin tones, less visual interpretation effort. Also check the R9 value, which the average CRI does not include. |
Do blue-light filtering glasses serve any purpose?Scientific reviews have not found convincing evidence that they reduce screen-related visual fatigue. They may have a role in the evening to limit melanopic exposure and promote sleep. For daytime fatigue, it is much more effective to correct the environment's illuminance, contrasts and flicker. |
Why do I get headaches in the office and not at home?The most frequent causes are three: luminaires with high flicker, direct glare from unshielded sources in the visual field and reflections on the screen. Check with the camera test, see if you can see the LED chips switched on and observe the screen switched off to identify reflections. |
Can I mount an LED strip without an aluminium profile?Technically yes, but it is not recommended wherever the strip is visible. Without a profile, you get glare, dotting effect and a 20-25 °C higher operating temperature, with consequent reduction in useful life and colour drift. The profile with opal diffuser should be considered an integral part of the source. |
What light to put in a child's room?500-750 lux are needed on the desk, CRI greater than or equal to 90 and total absence of flicker, with 4,000 K for studying and 2,700 K in the evening. Add an amber courtesy light at very low intensity for the night. Daily exposure to natural outdoor light remains decisive. |
How illuminated should the wall behind the monitor be?The luminance of the wall should be about one third of that of the screen, in order to bring the contrast ratio within the recommended 10:1. In practice, 100-150 lux on the wall are enough, achievable with about one metre of LED strip at 700-1,000 lm/m in a profile. |
Can LED light worsen myopia?There is no evidence that LED technology itself causes myopia. The documented risk factors are prolonged excessive near work and reduced exposure to natural outdoor light. Adequate indoor lighting reduces accommodative strain, but does not replace time spent outdoors. |
How often should an LED system be replaced?L80 sources at 50,000 hours, in domestic use, last for decades. The component that fails first is almost always the power supply, with a typical life of 30,000-50,000 hours if correctly sized. Design the system so that the driver remains accessible for replacement. |
How to correctly illuminate a bathroom mirror?With two vertical sources on the sides of the mirror, at face height, not with a ceiling spotlight above the mirror, which creates marked shadows on eyes and chin. About 500 vertical lux on the face are needed, CRI greater than or equal to 90 with high R9 and a deep opal diffuser to avoid glare. |
Light is a medical device that no one calls it that
At the end of this journey, the message is reduced to a few lines. Eyes are not ruined by a light bulb: they get tired every day, in a cumulative and silent way, when the luminous environment forces them to compensate. Compensating for excessive contrast, an invisible oscillation, an incomplete spectrum, a shadow in the wrong place.
The good news is that all these factors are measurable and all are correctable, often with interventions of a few tens of euros. One metre of LED strip behind a monitor changes the day of those who work there. An anti-flicker driver instead of a generic power supply eliminates a headache that was attributed to stress. A profile with diffuser transforms a technical source into a light that can be looked at.
The question to ask yourself in front of any system is not "how much does it consume" nor "how much does it cost", but "is this light working for or against my eyes?". If the answer is not immediate, you now have the tools to measure it: a luxmeter or an app, the smartphone camera, the quick diagnostic Table 26 and the fifteen-point checklist.
Choosing components with declared technical data (real flux, CRI and R9, modulation, SDCM, driver ripple, diffuser transmission) is the only way to know in advance what will enter your eyes for the next fifty thousand hours.
The information contained in this article has a technical and informative purpose and does not replace the opinion of an ophthalmologist or optometrist. In the presence of persistent visual disturbances, it is advisable to consult a specialist.
This article was developed with the support of artificial intelligence and subsequently reviewed, corrected and validated by the Ledpoint.it technical team, which guarantees its reliability and compliance with official sources.
```