Cookie Consent by Free Privacy Policy Generator
Close
Productos
    Filters
    Idioma
    Búsqueda

    Outdoor ceiling lights: a complete guide to safe lighting

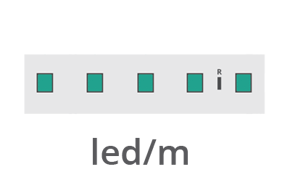
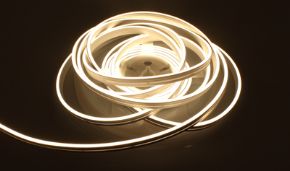
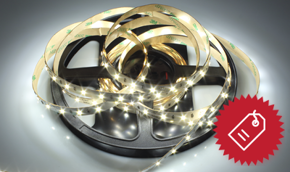
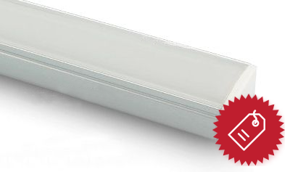
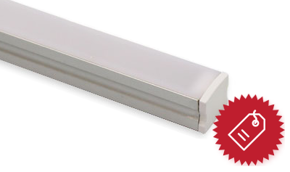
    Designing outdoor lighting with outdoor ceiling lights goes far beyond simply choosing a light fixture. It involves balancing aesthetics, functionality, safety, and durability in the challenging and variable outdoor environment. Outdoor ceiling lights, in particular, represent a versatile and essential solution for uniformly and safely illuminating areas such as entrances, porches, gazebos, façades, and covered terraces.


    This article, drawing on Ledpoint’s technical expertise, aims to serve as an extremely detailed and professional guide to understanding every aspect of selecting, installing, and maintaining an outdoor LED ceiling light.


    Outdoor ceiling lights: the importance of informed design


    By examining various outdoor ceiling lights, we’ll address not only finished products but—more importantly—the underlying “system” that ensures a high-quality installation: LED profiles. We’ll explore how combining a high-quality LED strip with the right structural and optical profile enables you to create a custom, high-performance, and long-lasting outdoor ceiling light capable of withstanding weather conditions for years. We’ll analyze critical technical specifications, materials, IP protection ratings, and possible placement scenarios, offering a comprehensive 360° perspective for both professionals and enthusiasts.


    Outdoor ceiling lights: why choose LED?


    Before diving into the technical aspects of outdoor ceiling lights, it’s important to define what they are and the benefits they bring to outdoor environments.


    Definition and function of outdoor ceiling lights

    Outdoor ceiling lights are luminaires designed to be mounted on ceilings or upper walls, diffusing light downward in a broad and uniform manner. When referring to outdoor LED ceiling lights, we mean fixtures specifically engineered for outdoor installation. Their primary function is to safely illuminate walkways and living areas, eliminating dangerous shadows, deterring intrusions, and extending the usability of outdoor spaces beyond sunset. Unlike directional spotlights, outdoor ceiling lights provide general, enveloping illumination.


    The unavoidable advantages of LED technology for outdoor use

    The LED revolution has made traditional halogen or discharge lamps obsolete for outdoor applications. Here are the technical reasons why outdoor LED ceiling lights are the only rational choice today:

    • exceptional luminous efficacy (lm/W): as seen in Ledpoint products (e.g., 110 lm/W from the F52-30s), LEDs convert most energy into light rather than heat. This means lower electricity bills and reduced thermal stress on components, significantly extending their lifespan;
    • long service life (30,000+ hours): a quality LED system, properly powered and thermally managed, lasts dozens of times longer than traditional lamps, drastically reducing maintenance and replacement costs—especially critical for hard-to-reach installations;
    • robustness and vibration resistance: LED chips are solid-state devices with no fragile filaments or glass parts. They withstand impacts and vibrations far better—common challenges in windy or high-traffic outdoor environments;
    • instant-on capability and excellent dimmability: LEDs reach full brightness immediately and can be smoothly dimmed using compatible drivers, allowing atmosphere control and additional energy savings;
    • compactness and design flexibility: LED strips—the core of the system—are thin and flexible. This allows seamless integration into profiles for outdoor ceiling lights with minimalist lines, creating continuous, discreet linear lighting effects.


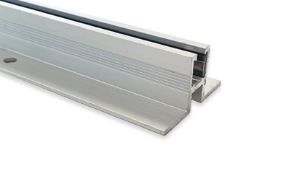
    LED profiles and materials for building outdoor ceiling lights


    The real difference between an amateur and a professional outdoor LED ceiling light installation lies in the profile. A profile isn’t just a housing—it’s a structural, optical, and thermal component of critical importance.


    Material comparison: extruded aluminum vs. alternatives

    For outdoor applications, high-quality extruded aluminum is the dominant material—and for excellent technical reasons:

    • Optimal thermal dissipation (heat sink): aluminum offers excellent thermal conductivity. The profile acts as a heat sink, absorbing heat generated by the LED chips and PCB and dissipating it into the surrounding air. LEDs operating at lower temperatures (within their optimal "junction temperature") maintain initial luminous flux longer and enjoy dramatically extended lifespans. Plastic profiles—even durable ones—would thermally suffocate LEDs, causing premature degradation.
    • Mechanical strength and dimensional stability: resists twisting and corrosion (when properly anodized or treated) and ensures the structure remains straight and stable over time, even across long spans.
    • Electrical grounding and safety: metal profiles can be grounded, enhancing electrical safety in humid environments.

    Plastic or painted steel profiles are generally discouraged for permanent, high-quality outdoor ceiling light installations unless equipped with integrated thermal management systems.


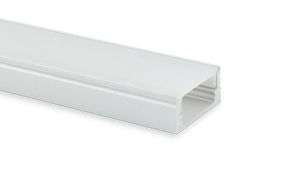
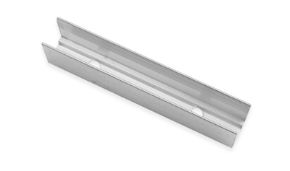
    Structure of a technical outdoor profile

    A technical profile for outdoor ceiling lights is a complex system. Let’s break down its components:


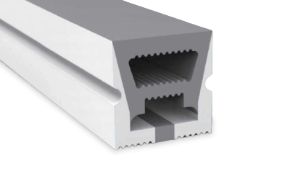
    1. Main body (profile)
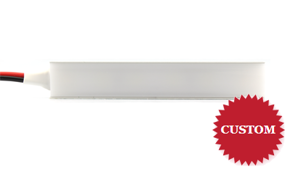
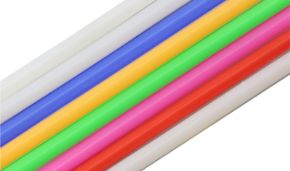
    Made of extruded aluminum, it features one or more channels for housing the LED strip. Wall thickness and shape determine rigidity and heat dissipation capacity. Outdoor profiles typically have generous wall thicknesses (e.g., 1.5–2 mm).


    2. Cover (diffuser)

    A critical element for both aesthetics and protection. It can be made of PMMA (acrylic) or Polycarbonate (PC). For outdoor use, polycarbonate is often preferred due to its superior impact and UV resistance. Diffusers come in several types:

    • Clear: maximum light transmission, but individual LEDs may be visible (“dotting effect”).
    • Opal (milky): provides highly uniform diffusion, hiding individual light points. Ideal for outdoor LED ceiling lights where soft, glare-free illumination is desired.
    • Microprismatic: controls light emission angle to reduce glare. Highly technical.


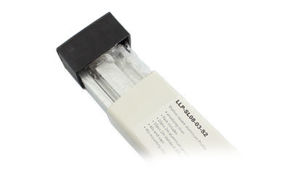
    3. Sealing system (gaskets)

    This is where the IP rating battle is won or lost. Waterproof profiles for wall or ceiling mounting feature continuous silicone gaskets between body and cover. Sealing integrity relies on uniform pressure, often achieved via snap clips or calibrated spacer screws.


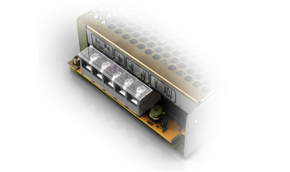
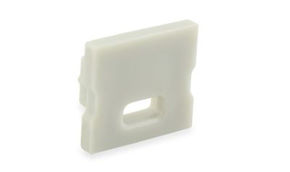
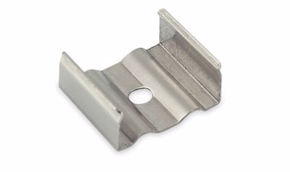
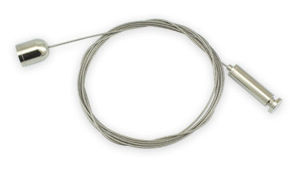
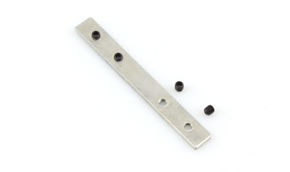
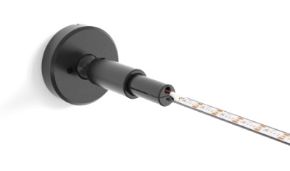
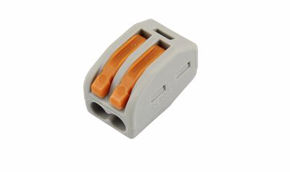
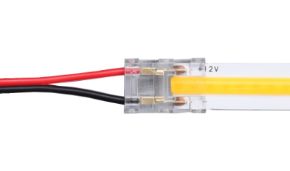
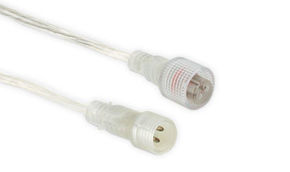
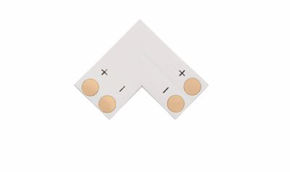
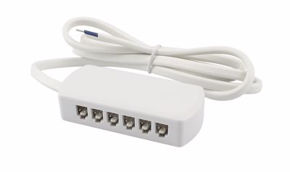
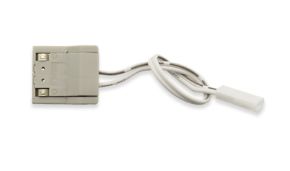
    4. Mounting and closure accessories

    Includes brackets, A2/A4 stainless steel screws, end caps with gaskets, and terminal blocks for power connections. All must be made of corrosion-resistant materials (stainless steel, aluminum, or high-grade plastic).


    Protection is everything: IP and IK ratings for outdoor ceiling lights


    This section is perhaps the most crucial for ensuring the electrical safety and longevity of your outdoor LED ceiling light. Choosing insufficient protection guarantees premature—and potentially hazardous—failure.


    Decoding the IP (Ingress Protection) rating

    The IP code (e.g., IP65, IP67) indicates protection levels against solids (first digit) and liquids (second digit). Minimum recommended ratings for outdoor ceiling lights include:


      • IP44: protection against objects >1 mm and water splashes from any direction. Absolute minimum for partially sheltered outdoor installations (e.g., under deep eaves where direct rain doesn’t hit);
      • IP65: dust-protected (no harmful ingress) and protected against water jets (12.5 mm nozzle) from any direction. Recommended standard for most outdoor ceiling lights—ideal for eaves, gazebos, and porches exposed to wind-driven rain. The safest and most common choice;
      • IP66: dust-tight and protected against powerful water jets (12.5 mm nozzle) from any direction. Suitable for highly exposed locations;
      • IP67: dust-tight and protected against temporary immersion (30 minutes at 1 m depth). Not required for rain alone, but indicates exceptional sealing—useful in flood-prone areas or for aggressive cleaning;
      • IP68: continuous submersion beyond 1 m. Rare for ceiling lights; more typical for in-ground spotlights.


    Important: the IP rating applies to the fully assembled system (profile + cover + gaskets + end caps). Installing an IP20 LED strip inside an IP65-rated profile does **not** make the entire system IP65—you need a fully compatible kit.


    IK rating (mechanical impact resistance)

    Often overlooked, the IK rating (e.g., IK08, IK10) measures protection against mechanical impacts (e.g., hail, stones, accidental knocks). Expressed in joules (impact energy), IK08 (5 J) or higher is recommended for low-mounted outdoor fixtures. A polycarbonate diffuser significantly contributes to achieving a good IK rating.


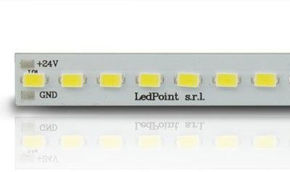
    Designing outdoor ceiling lights: power, lumens, and color temperature


    Selecting the right outdoor LED ceiling light system requires precise calculations. The goal isn’t to choose “the brightest” option, but rather the solution delivering the right amount of light, in the desired color, for the specific context.


    From lumens to lux: calculating required light output

    Lumens (lm) measure total luminous flux emitted by the source (e.g., 1970 lm/m for the F52-30s strip). Lux (lx) measure illuminance—how many lumens fall on a surface (1 lx = 1 lm/m²). To design effectively:


    1. determine desired illuminance level (lux): a home entrance may require 100–150 lx, a garden seating area 50–100 lx, and a pathway 30–50 lx. Reference standards (e.g., UNI norms) provide guidance;
    2. calculate the area to illuminate (m²);
    3. estimate the utilization factor (CU): account for mounting height, beam angle (determined by diffuser), and nearby surface reflectivity. For simplified outdoor calculations, use CU = 0.5–0.7;
    4. formula: total required lumens = (desired lux × area in m²) / utilization factor (CU);
    5. select the LED strip: divide total lumens by the strip’s lm/m to find required linear meters. Example: To illuminate 10 m² at 100 lx (CU=0.6): total lumens = (100 × 10)/0.6 ≈ 1667 lm. With the F52-30s (1970 lm/m), ~0.85 linear meters suffice. In practice, you’d distribute multiple light points—but this calculation gives total required output.


    Choosing color temperature  for outdoor use

    Measured in Kelvin (K), the color temperature defines the “tone” of white light. Typical choices for outdoor ceiling lights include:


    • 2700K – 3000K (warm white): Cozy, intimate light resembling traditional halogen bulbs. Perfect for relaxed atmospheres on terraces, gazebos, and residential entrances. Ledpoint’s F52-30s (3000K) is ideal for this purpose;
    • 4000K (neutral white): Objective, energizing light similar to morning daylight. Excellent for functional areas like covered parking, shop entrances, or offices where detail visibility matters. The F52-40s offers 4000K;
    • 5000K+ (cool white): Very clinical, intense light. Used in industrial or commercial settings. Often too harsh and unwelcoming for residential outdoor use.


    Tip: For visual harmony, use the same CCT throughout a given area. “3-step” strips (like those mentioned) guarantee minimal CCT variation, avoiding noticeable tonal differences between segments.


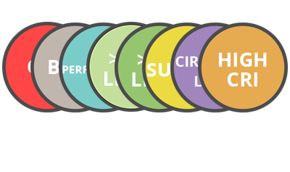
    Color Rendering Index (CRI or Ra)

    CRI measures a light source’s ability to reveal natural object colors. CRI >80 is good; >90 is excellent. For gardens where plant and furniture colors matter, investing in CRI 90+ makes a visible difference. High-end LED strips offer this feature.


    Location analysis and specific solutions


    Each outdoor location presents unique challenges. Let’s explore how to design and select the optimal outdoor ceiling light system for each scenario.


    Under a roof overhang or porch (partial shelter)

    This is the classic case. The area is partially shielded from direct rain but exposed to humidity, thermal cycling, dust, and—near coasts—salt spray.


    Technical choices

    • IP Rating: IP44 may suffice under deep overhangs where wind-driven rain can’t reach the fixture. For shallower overhangs or maximum safety, IP65 is unequivocally recommended.
    • Profile and installation: you can use suspended profiles (with cables) or surface-mounted directly to the porch ceiling. In the latter case, ensure the ceiling is flat and the profile is mounted to avoid water pooling on its top surface (drainage holes in the profile are a plus).
    • Color temperature: 2700K–3000K for a welcoming home entrance atmosphere.
    • Thermal management focus: Under enclosed overhangs, airflow may be limited. Ensure the aluminum profile has sufficient cross-section for effective heat dissipation.


    On a Perimeter Wall or Low Parapet (Direct Exposure)

    Here, the outdoor LED ceiling light is mounted vertically but oriented toward the sky or slightly tilted—fully exposed to the elements.


    Critical technical choices

    • IP Rating: IP65 is mandatory. IP66 is advisable for maximum resilience against heavy rain and strong winds.
    • Wall-Mount Waterproof Profile: essential to select profiles specifically engineered for outdoor wall mounting. These feature:
      • High-quality, continuous sealing gaskets on all sides—especially along the wall-contact edge.
      • Mounting systems that preserve seal integrity. Often achieved via through-screws with washer gaskets under the head, or internal clamping clips.
      • Lateral or rear cable entries with IP67-rated waterproof cable glands. Avoid top-entry designs to prevent gravity-driven water ingress.


    In a gazebo or pergola (overhead lighting)

    Gazebos have roofs—often fabric, wood, or polycarbonate. The ceiling light mounts to the internal roof structure, illuminating the space below. Protected from vertical rain but exposed to humidity, nighttime condensation, and possibly lateral splashes.


    Technical choices

    • IP rating: IP44 may suffice if the gazebo has side curtains. For open or semi-open structures, IP65 remains the safest choice.
    • Profile and aesthetics: aesthetics matter greatly here. Consider very slim, minimalist profiles with opal diffusers for soft, non-glare light for seated guests. Central suspended profiles create attractive focal points.
    • Power supply and wiring: plan cable routing along gazebo beams neatly and safely using outdoor-rated conduits or cable ties. Position the driver (power supply) in a dry, sheltered location—preferably not directly under the fixture if the gazebo isn’t fully enclosed.


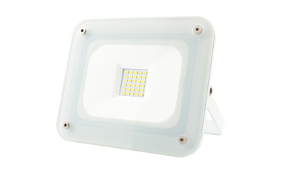
    Façades and soffits (architectural lighting)

    Outdoor LED ceiling lights can be installed in series to uniformly illuminate building façades or provide perimeter security lighting beneath eaves.


    Technical choices

    • IP rating: IP65/66 is mandatory. Eaves can channel significant water flow;
    • Linear profile and continuity: use long (up to 2–3 m) or joinable profiles to create seamless light lines. Joints must be sealed with IP65-rated connection kits.
    • Glare control (UGR): for façades, profiles often use microprismatic diffusers or satin glass to direct light downward or onto the façade—minimizing light pollution and neighbor disturbance.
    • Light color: 3000K or 4000K are most common. 4000K offers a more modern, institutional look.


    Installation and maintenance: practical tips for longevity


    Even the best design can fail due to rushed installation. Following these guidelines is crucial for the long-term success of your outdoor LED ceiling lights.


    Pre-installation phase: planning

    Before purchasing or installing, carefully plan component placement—including electrical accessories.


    • Surface inspection: ensure the mounting surface (wall or ceiling) is flat, solid, and dry. Treat wood with sealants and fill wall cracks.
    • Cable routing and power point: decide where to place the driver (power supply). It must be in a technical room, IP65-rated enclosure, or otherwise well-protected area. Remember that low-voltage (12/24V) cable runs from strip to driver should not exceed recommended lengths (typically 5–10 m) to avoid voltage drop causing flicker or power loss.
    • Grounding (for metal profiles): if using metal profiles and your electrical system requires it, verify grounding continuity.


    Installation phase: critical steps

    Challenges may arise during installation—here are best practices for mounting outdoor ceiling lights:


    1. Profile preparation: if needed, cut the profile to length using a cold-cut metal saw. Deburr edges and clean the channel of debris or dust.
    2. LED strip application: peel the 3M adhesive backing (standard on Ledpoint strips) and press the strip firmly into the channel. Avoid excessive bending (respect minimum bend radius). Ensure cut points align with designated solder pads if making turns or cuts.
    3. Wiring and connections: use adequately sized cables (e.g., 2×0.75 mm² for 24V). Connections must be soldered and tinned or made with waterproof crimp connectors. Insulate each joint with high-quality heat-shrink tubing. NEVER use screw terminals or electrical tape outdoors.
    4. System sealing: before closing the diffuser, verify all gaskets are clean and correctly positioned. Install end caps with their gaskets. Tighten closure screws evenly and to the specified torque to avoid deforming the profile or diffuser.
    5. Structural mounting: secure the profile using all designated anchor points. For walls, apply a thin bead of neutral outdoor-grade silicone sealant behind the profile before mounting to ensure full adhesion and prevent behind-profile water infiltration.


    Scheduled Maintenance

    Minimal but essential:


    • Periodic cleaning (1–2 times/year): turn off power. Clean the diffuser with a soft microfiber cloth and mild soapy water. Avoid solvents or abrasive cleaners that could cloud the surface;
    • Gasket inspection: every 2–3 years, visually check silicone gaskets. Replace if dry, cracked, or losing elasticity—these inexpensive spare parts protect costly components;
    • Mounting point check: verify screws and brackets haven’t loosened.


    Outdoor ceiling lights: investing in quality for safe illumination


    Creating a beautiful, functional, and durable outdoor ceiling light system isn’t something to improvise. It demands careful planning, high-quality components (from LED strips to profiles, diffusers, and connectors), and meticulous installation. Ledpoint products—such as high-efficiency LED strips and waterproof wall-mount profiles—are engineered to provide the solid foundation needed for successful outdoor lighting projects.


    Remember: safe outdoor lighting starts with choosing certified, properly protected products. It also means providing sufficient illumination to prevent accidents while remaining non-intrusive to avoid light pollution. Finally, it means designing for the long term—where material quality and installation precision translate into years of worry-free service and minimal repair costs.


    We hope this guide has helped you navigate the world of outdoor LED ceiling lights. For any technical or design questions, Ledpoint’s team is ready to assist you with expertise and passion.