


LED quality: how to test led modules or strips before installation
In today's lighting market, LED quality determines the difference between high-end products and budget solutions. LED quality is substantial—not only in terms of immediate performance but especially regarding longevity, energy efficiency, and installation safety. Testing an LED module or an LED strip before final installation is not a practice reserved exclusively for industry professionals; it is a fundamental procedure that every attentive user should consider. This article, developed by Ledpoint technicians, aims to be the most comprehensive and detailed guide available for understanding, measuring, and verifying every aspect that defines the actual LED quality of a product. Through a methodical analysis of key parameters, required measurement tools, and standardized testing procedures, we provide all the knowledge needed to make informed choices and prevent unpleasant post-installation surprises.
Our approach will be both theoretical and practical: we will begin by understanding the physical and electrical characteristics of LEDs, then move on to concrete verification methodologies. According to recent industry studies, over 35% of LED products on the market do not fully comply with manufacturer specifications, with deviations reaching up to -40% in promised luminous flux or +30% in energy consumption. These discrepancies are not merely economic issues—they can compromise the final lighting outcome, especially in professional applications where light uniformity and color rendering are critical parameters. We will thoroughly address the most frequent questions users ask when evaluating an LED product: how to recognize LED quality?, how to determine if LEDs are good?, which LEDs are the brightest?, is LED better than QLED? (with the necessary clarification that this comparison is inappropriate, as they are distinct technologies). We will go beyond superficial answers, diving into the technical details of each aspect, providing comparative tables, updated statistical data, and step-by-step procedures replicable by anyone with the proper equipment and a good measure of patience. Before addressing testing procedures for LED quality, it is essential to establish a solid theoretical foundation by understanding the objective parameters that determine the quality of a light-emitting diode (LED). These parameters are not negligible: they are precisely measurable physical quantities regulated by international standards (such as those defined by the International Commission on Illumination – CIE or Underwriters Laboratories – UL) and represent the true technical "identity card" of any LED-based product. Market confusion often stems from a lack of transparency in communicating these data by some manufacturers or their misinterpretation by consumers. Luminous flux, measured in lumens (lm), represents the total quantity of light emitted by a source in all directions. It most directly answers the question: "how bright is this LED?". However, considering lumens alone is misleading. The true measure of an LED's efficiency is luminous efficacy, expressed in lumens per watt (lm/W), indicating how much light is obtained per unit of electrical energy consumed. High LED quality yields high efficacy—typically above 120 lm/W for consumer-grade products and exceeding 180 lm/W for next-generation chips used in professional applications. During testing, it is crucial to verify that the declared lumen/watt ratio is respected under real operating conditions, noting that efficacy decreases as junction temperature rises. The correlated color temperature (CCT), measured in Kelvin (K), defines the hue of the emitted light, ranging from warm (2700K–3000K) to cool (5000K–6500K). A quality LED maintains the declared CCT stably throughout its lifespan and shows minimal variation between units from the same production batch (binning uniformity). The Color Rendering Index (CRI or Ra) is a value from 0 to 100 indicating how naturally and faithfully illuminated objects' colors are reproduced compared to an ideal reference source. For residential and commercial applications, a CRI ≥ 80 is considered acceptable; for clothing stores, museums, or photography studios, a CRI ≥ 90 is required (often labeled "CRI90+" or "High CRI"). Low LED quality often sacrifices CRI to boost luminous efficacy, resulting in "flat," unnatural light. LEDs are constant-current devices. Their nominal operating current (typically 350mA, 700mA, or 1050mA for power LEDs) is critical: exceeding it even slightly exponentially accelerates chip degradation (the overdrive phenomenon). A high-quality LED driver precisely regulates this current. Junction voltage (Vf) varies with temperature and between individual chips. The power factor (PF) measures how effectively power is drawn from the grid. A low PF (e.g., 0.5) means higher grid current is drawn than necessary to deliver active power to the LED, causing distribution losses. For larger installations, standards like CEI EN 61000-3-2 require PF > 0.9. The table above offers an immediate comparative overview. In the following chapters, we will detail how to practically measure each of these parameters. To evaluate LED quality once the defining parameters are understood, a set of measurement tools is necessary. The good news: a multi-thousand-euro laboratory is not required. With a modest investment and knowing what to check, highly significant tests are achievable. Below we describe essential tools, categorized by depth of analysis and budget. For initial integrity and functionality checks, these tools suffice: For in-depth analysis and certifiable data: Tool selection depends on objectives. For a hobbyist buying LED strips for home use, a multimeter and lux meter may suffice. For a professional installer or corporate buyer, investment in advanced instrumentation quickly pays off by avoiding substandard products. We now describe a systematic procedure applicable to both an LED strip and an LED module (such as a panel or downlight). The procedure is modular—you may perform all tests or only those most critical for your application. The ideal environment is a dark or semi-dark room at controlled temperature (approx. 25°C) to avoid ambient light interference. Before powering on, an led product reveals many quality clues: Connect the LED to its nominal power supply via a multimeter set as an ammeter in series to obtain further critical parameters for determining LED quality. Power on the LED and let it run for at least 30–60 minutes to reach thermal equilibrium ("steady state"). Measurements taken while cold are not meaningful for assessing LED quality. The most revealing test for LED quality is long-term stability. Keep the LED powered continuously for 24–72 hours in a well-ventilated environment without abnormal forced airflow. Monitoring Record power consumption and lux values at start, after 1 hour, 6 hours, 24 hours, etc. What to observe A product that successfully passes a 72-hour burn-in test has an excellent likelihood of meeting its declared lifetime (e.g., L70 > 50,000 hours) and qualifies as a product offering genuine LED quality in terms of ROI. Once data is collected, correctly interpreting it to determine actual LED quality is crucial. Not all deviations are critical. Below is an interpretation guide. Per industry standards (e.g., ANSI C78.377, IEC/PAS 62717), some tolerances are physiological: True led quality is a balance. A product claiming stratospheric luminous efficacy (e.g., 200 lm/W) but with a CRI of 70 is sacrificing color rendering for lumens. A driver with PF 0.95 and THD < 10% costs more but is more efficient and "cleaner" for the grid. Price is not always indicative, but an extremely inexpensive product rarely offers top-tier components, proper LED binning, or complete protection circuits. Your tests should confirm the product delivers the best compromise for your specific application. Testing led quality before installation is an investment in time and (modest) instrumentation that pays rich dividends in reliability, energy savings, light quality, and ultimately, end-user satisfaction. The initial questions find their practical answers here... Ledpoint’s final recommendation is to never rely solely on catalog specifications. You will always find detailed technical datasheets for LEDs accompanying the product page. Only this way can you be certain you are investing in led lighting that not only shines brightly at switch-on but will continue to do so efficiently and pleasantly for thousands of hours. For deeper insights on specific product types (high-quality led strips, quality led modules, COB led quality), Ledpoint’s entire technical and commercial team remains at your complete disposal. You can always contact us.What defines led quality?
Luminous flux (lumens) and luminous efficacy (lumens/watt)
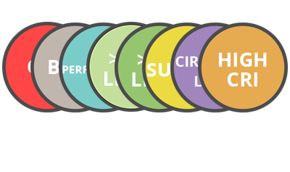
Correlated Color Temperature (CCT) and Color Rendering Index (CRI/Ra)
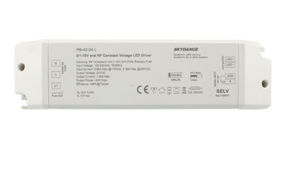
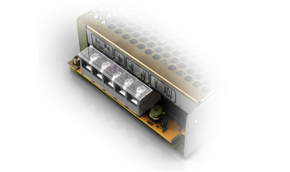
Operating voltage, current, and power factor
Parameter Unit of measure Typical low-quality value Typical high-quality value Measurement tool Luminous Flux Lumens (lm) Often 20–40% below declared Consistent with specifications (±10%) Integrating sphere, Photopic lux meter Luminous Efficacy lm/W < 80 lm/W > 120 lm/W (up to 200+ lm/W for top-tier) Wattmeter + Integrating sphere CRI (Ra) Scale 0–100 < 70 > 80 (≥90 for High-CRI) Spectroradiometer CCT Uniformity (Binning) MacAdam SDCM (steps) > 5 SDCM (visible variations) ≤ 3 SDCM (minimal variations) Spectroradiometer Power Factor Scale 0–1 0.5 – 0.7 > 0.9 Power analyzer THD (Total Harmonic Distortion) Percentage (%) > 20% < 10% Power analyzer Tools required for led quality testing
Basic tools (entry level)
Professional tools (advanced level)
Step-by-step testing procedure for led quality of modules and strips
Phase 1: visual and constructive inspection
Phase 2: cold and power-on electrical tests
Phase 3: photometric and thermal tests
Phase 4: accelerated lifetime test (burn-in test)
Data analysis to define led quality
Acceptable tolerances vs. warning signs
Parameter correlation: the balance of quality
LED quality: invest a little time to install the right product