


Movable gullies: what are they and how to illuminate them?
Welcome to the definitive guide on lighting cabinet recesses, a design element that is revolutionizing modern interior design. This lighting technique—featured at international trade shows such as SICAM in Pordenone—does more than just illuminate dark spaces; it radically transforms the perception of environments, creating evocative and functional atmospheres. Through the use of innovative neon flex and LED strips, it’s now possible to achieve high-end installations with an exceptional cost-to-benefit ratio, often without the need for complex aluminum profiles.
In the world of furniture lighting design, attention has shifted from standalone luminaires to integrating light directly into structural elements. Cabinet recesses—those grooves or cavities often overlooked—are now becoming protagonists of refined, tech-forward design. This article will take you on a comprehensive journey, from technical fundamentals to the latest trends, revealing how to light cabinet recesses professionally and durably. We’ll explore in detail why this solution represents a smart investment and how Ledpoint products—particularly neon flex—can significantly simplify the installation process.
What are recesses and why light them?
Cabinet recesses, also known as grooves or technical cavities, are recessed spaces originally conceived for structural or aesthetic reasons. In contemporary design, these elements have been rediscovered as true luminous “canvases.” Lighting cabinet recesses means leveraging these negative spaces to generate diffuse, source-free illumination that enhances shapes and materials. Light emanating from a hidden source spills uniformly into the environment, creating an enveloping effect with significant visual impact. This technique is fundamental to modern lighting design, as it shifts focus from the object emitting light to the effect that light produces on the surrounding space and objects.
From a functional standpoint, lighting a recess can serve multiple purposes: ambient or accent lighting, safety lighting along pathways, or purely decorative effects. The illuminated recess becomes an active architectural feature that dialogues with its surroundings. The choice of how to light these surfaces depends on the desired effect: warm, soft light for an intimate living room; neutral, precise light for a study bookshelf; or dynamic RGB LED lighting for a playful atmosphere. Ledpoint offers technical solutions for every need, ensuring uniformity and light quality.
Principles of lighting design applied to recesses
To light recesses effectively, it’s essential to understand some basic principles of lighting design. The first concept is luminous uniformity: the goal is to achieve a continuous, homogeneous line of light without dark spots or excessive brightness (the “dotted” effect). This result is achieved through an adequate LED density and the use of appropriate diffusers. For example, COB (Chip on Board) technology—as used in Ledpoint LED strips—“creates seamless lines of light without the classic dotted effect and offers a wide diffusion angle,” which is essential for a professional finish.
Other crucial technical parameters include lumens, which measure total luminous flux, and lux, which measure illuminance on a surface. To calculate lux for an installation, one must consider the distance between the LED strip and the surface to be illuminated, as well as the emission angle. Ledpoint provides guides and tools to perform these calculations easily. Finally, color temperature (CCT) and Color Rendering Index (CRI or Ra) are critical for ambiance and color fidelity. A high CRI—as guaranteed by quality products—is essential when light must enhance fabrics, artwork, or premium materials.
Advantages and benefits of lighting recesses
Lighting cabinet recesses offers benefits that go far beyond mere visibility. Aesthetically, it transforms a passive element into a character-defining light source, defining volumes, enhancing textures, and creating depth. An illuminated recess along a wall-mounted cabinet or staircase becomes an elegant graphic line that guides the eye. Functionally, this indirect light reduces glare, creating a visually comfortable environment ideal for relaxation or concentration. In kitchens or bathrooms, recess lighting under cabinets provides perfect task lighting for work areas, free of shadows.
From an interior design perspective, integrated lighting allows experimentation with perception: a ceiling with a perimeter-lit recess appears higher; a narrow room feels wider. It’s a powerful tool for designers and DIY enthusiasts alike to personalize and elevate any space. Using products like Ledpoint’s neon flex amplifies these advantages, offering a perfectly continuous, moldable line of light—even around complex curves—with rapid installation.
Practical and energy efficiency benefits
Beyond aesthetics, LED recess lighting offers undeniable practical advantages. First is the long lifespan of LED sources, which can exceed 50,000 hours, drastically reducing maintenance and replacement costs. Second is high energy efficiency: modern LEDs—such as SMD 2835 or COB—convert most of their consumed energy into light, with efficiencies in Ledpoint products reaching up to 110 lm/W. This translates into lower electricity bills and reduced environmental impact.
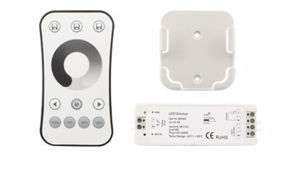
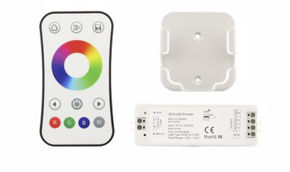
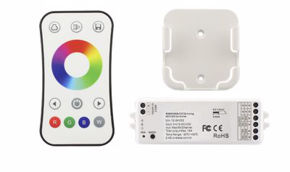
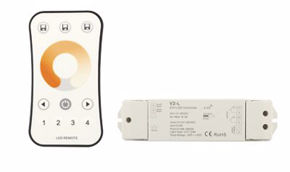
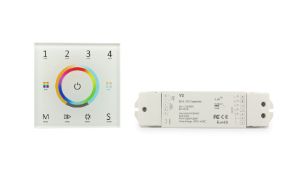
Another practical advantage is installation flexibility. LED strips are thin, flexible, and come with high-quality 3M adhesive (like the 3M 9495LE used by Ledpoint), enabling quick, secure mounting—even on curved surfaces. Their ability to be cut every 10 cm or 4.55 cm (depending on the model) makes them adaptable to any recess length without waste. Finally, compatibility with dimming and smart control systems (Wi-Fi, Bluetooth, Zigbee) allows real-time adjustment of intensity and color to match mood or activity.
Overview of LED products for recesses
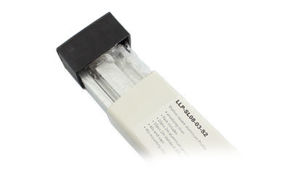
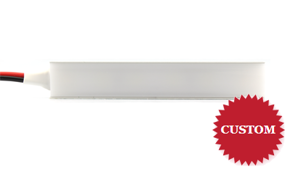
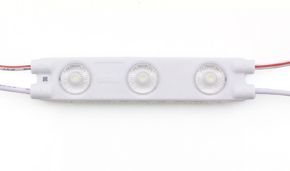
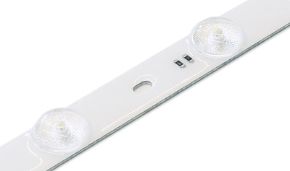
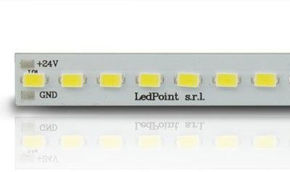
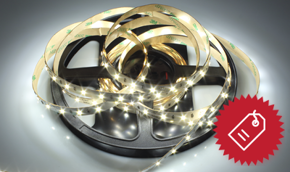
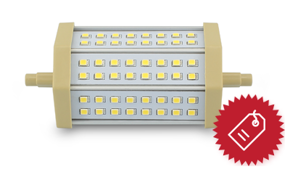
Flexible LED strips are the most widespread and versatile solution for lighting recesses. These consist of flexible printed circuit boards (PCBs) with regularly spaced LED chips soldered on. Ledpoint models—such as the F52-40s-0608H2 or COB strips—deliver excellent performance. The choice between types depends on the desired effect: SMD 2835 strips offer a great balance of efficiency (95 lm/W) and cost, while COB technology is unmatched for light uniformity thanks to its integrated diffusive coating.
These strips are designed for quick mounting, often “even on curved surfaces,” and operate at low voltage (typically 12V, 24V, or 48V), ensuring safety. Technical specs like power per meter (e.g., 14.4 W/m), luminous flux (e.g., 1270 lm/m), and color temperature (3000K, 4000K, etc.) are clearly indicated, enabling informed choices. The inclusion of professional-grade 3M 9495LE double-sided tape ensures long-lasting adhesion—critical for permanent installations.
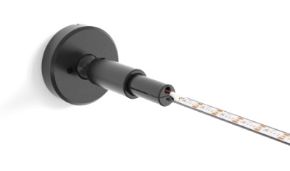
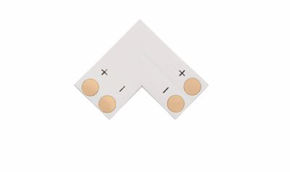
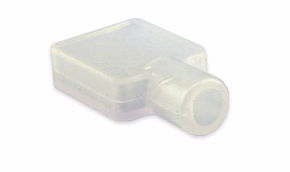
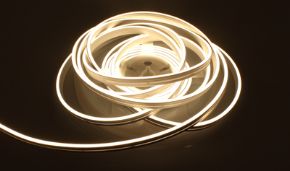
Neon flex: the revolution for simple, professional installations
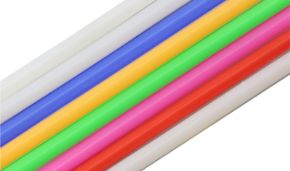
Neon flex (or silicone LED neon) is the ideal solution for those seeking maximum aesthetic impact with minimal installation effort. It consists of a flexible silicone or PVC tube with integrated LEDs. Its main advantage over traditional LED strips is perfect light uniformity: the tube acts as a diffuser, creating a continuous, homogeneous line indistinguishable from classic neon—but with all the benefits of LED technology.
For quickly lighting cabinet recesses, neon flex is unbeatable. It’s ready to use, often requires no aluminum profile for diffusion (reducing cost and time), and is incredibly easy to install thanks to its flexibility and mounting options. On Ledpoint, you’ll find high-quality neon flex in various sizes and color temperatures—perfect for smooth curves or luminous lettering integrated into furniture. The cost-to-benefit ratio is exceptional, especially considering the professional result and installation longevity.
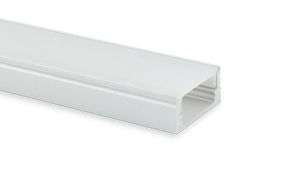
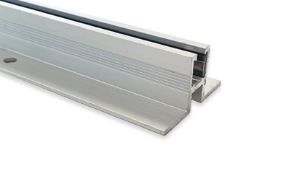
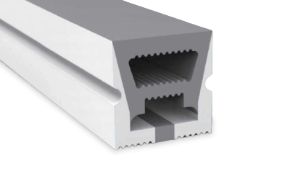
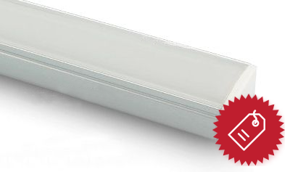
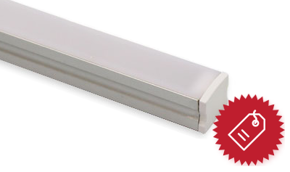
Aluminum profiles: when and why to use them
Aluminum LED profiles are extruded channels designed to house and protect LED strips. Their use with cabinet recesses is recommended in several cases: when the recess is very deep and requires a rigid support to correctly position the strip; when a flush finish with an opal or transparent diffuser is desired to completely hide individual LEDs; or in environments requiring better heat dissipation to ensure long LED life.
However, for many cabinet recess applications, profiles may be unnecessary—especially when using high-quality neon flex or COB strips that already integrate excellent diffusion. Skipping the profile reduces material costs, simplifies logistics, and shortens installation time. This decision depends on the specific context, desired visual effect, and budget. Thanks to their build quality and strong adhesive, Ledpoint products often enable excellent installations even without a profile.
Advanced installation techniques
Before picking up a soldering iron or peeling off adhesive backing, meticulous planning is key to success. The first step is precisely measuring the total length of all recesses to be lit, accounting for corners and curves. This allows calculating the exact amount of product needed, using designated cut points (e.g., every 10 cm for F52) to minimize waste. Next, the electrical circuit must be planned: determine how many linear meters of strip or neon flex can be connected in series before requiring a new power supply to avoid voltage drops that cause uneven lighting.
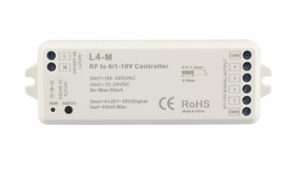
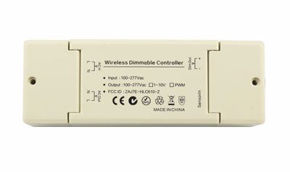
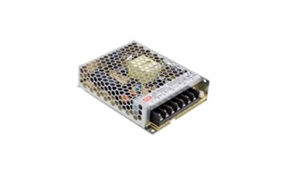
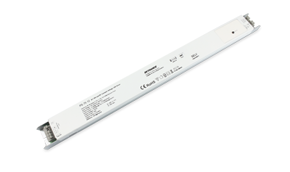
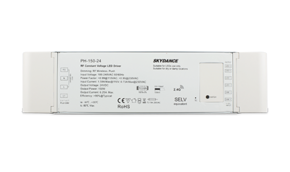
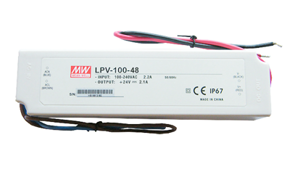
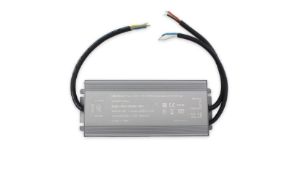
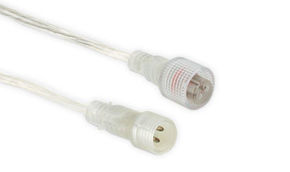
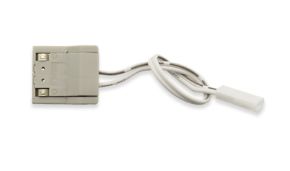
Then choose the right power supply. Its wattage should exceed the total LED load by about 20%. For professional, safe installations, opt for branded power supplies with built-in protections that deliver stable voltage (e.g., 24V ±15%). In humid environments like bathrooms or kitchens, products and power supplies must have the appropriate IP rating (e.g., IP65 or higher). Ledpoint supplies all necessary components—strips, power supplies, connectors, dimmer controllers—for a complete, reliable system.
Step-by-step guide to profile-free installation
Here’s a practical guide to lighting cabinet recesses using neon flex or high-quality adhesive LED strips—bypassing aluminum profiles entirely.
Surface preparation: the recess must be clean, dry, smooth, and free of dust or grease. Use a microfiber cloth dampened with isopropyl alcohol for thorough degreasing. This step is crucial for 3M adhesive performance.
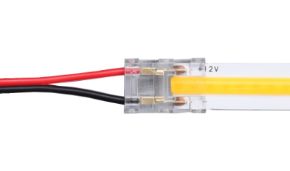
Product preparation: lay the LED strip or neon flex flat, measure, and mark cut points if needed. For neon flex, cut only at scissor-marked points using sharp scissors.
Ground test: before applying anything, temporarily connect the strip or neon flex to the power supply and turn it on. Verify all segments light correctly—this avoids gluing a defective product.
Application: gradually peel the adhesive backing (a few centimeters at a time). Carefully position the strip’s start in the recess, pressing firmly. Proceed centimeter by centimeter, peeling and pressing the strip into place—avoiding tight bends or folds that could damage circuits.
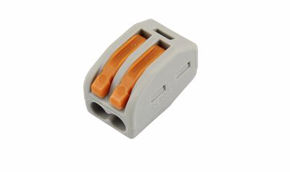
Wiring and concealment: once the entire run is installed, connect power cables using clip connectors or soldered joints protected with heat-shrink tubing. Route and hide cables neatly inside the cabinet or along its structure for a clean, professional look.
Final test: connect the power supply to mains and test the full installation. Check light uniformity and verify dimmer or controller functionality.
Following this procedure with quality products like Ledpoint’s enables a high-end cabinet recess lighting installation in minimal time.
Cost-benefit analysis and comparison
Let’s analyze the cost-to-benefit ratio between the classic approach (LED strip + aluminum profile) and the streamlined neon flex solution.
Classic solution (LED strip + profile):
Material costs: LED strip price + extruded aluminum profile (per meter) + polycarbonate diffuser (if required) + mounting brackets/screws + profile-specific connectors;
Installation time: longer. Includes measuring/cutting the profile, mechanical fastening to the recess (with screws or structural adhesive), inserting the LED strip, and snapping on the diffuser.
Advantages: superior heat dissipation, extremely professional and durable finish, ability to replace only the LED strip in the future.
Disadvantages: higher total cost, more complex installation requiring greater skill (aluminum cutting, drilling), reduced flexibility for tight curves.
Neon flex solution:
Material costs: neon flex price (per meter). Often no additional components needed beyond connectors and power supply.
Installation time: shorter. Product is ready to use, flexible, and self-adhesive. Installation involves cleaning, peeling, and direct application.
Advantages: lower total cost, extremely fast installation, high-end aesthetic with perfectly uniform light, exceptional flexibility for complex curves.
Disadvantages: slightly lower heat dissipation (though sufficient for most residential applications), less modularity for replacing small segments.
Conclusion
For most recess lighting projects in standard residential or commercial settings, neon flex offers a superior cost-to-benefit ratio, delivering a professional result faster and at a lower investment. Aluminum profiles remain essential for high-traffic public installations or where extreme mechanical durability is required.
Return on Investment (ROI) and Added Value
Investing in quality LED recess lighting isn’t an expense—it’s a value-generating investment. The ROI manifests across multiple dimensions:
Energy savings: switching to efficient LED technologies like Ledpoint strips (110 lm/W) can reduce lighting energy consumption by up to 80% compared to halogen or fluorescent systems.
Reduced maintenance costs: the long LED lifespan (50,000+ hours) eliminates lamp replacement costs for years.
Enhanced brand image: for commercial spaces (stores, restaurants, hotels), professional ambient lighting boosts perceived prestige and customer experience—translating into higher sales or loyalty.
Property value increase: in residential contexts, integrated, modern lighting design enhances a home’s appeal and market value.
Choosing quality products like Ledpoint’s is integral to this ROI. Premium components (high-grade LED chips, gold/silver PCB traces, 3M adhesive) ensure consistent performance over time, avoiding premature lumen depreciation or strip detachment—common issues with low-cost alternatives that erase any initial savings.
Trends and case studies
Major international trade fairs for design and lighting—such as SICAM (International Exhibition of Components for Furniture Manufacturing) in Pordenone or Euroluce in Milan—are where trends emerge and solidify. Observing recent editions reveals clear directions for recess lighting:
Minimalism and invisibility: the trend leans toward fully integrated, “hidden” light. Recesses are becoming thinner and more precise, while LED technology evolves to deliver maximum brightness in minimal space. Demand is rising for ultra-sharp light lines with zero visible point sources;
Dynamics and control: lighting is no longer static. Systems that adjust color temperature (from warm 1800K to cool 6500K) along the same strip (Tunable White), or create chromatic scenes with RGB/RGBW, are spreading. Control happens via apps, voice assistants, or automations based on time or daylight;
Sustainability and circularity: beyond efficiency, there’s growing demand for products with transparent supply chains, recycled/recyclable materials, and designs enabling easy disassembly and component replacement at end-of-life;
Horizontal/vertical integration: illuminated recesses are no longer just horizontal (ceilings, under-cabinet bases) but increasingly vertical—to highlight panel divisions, full-height wardrobe contours, or bed headboards.
Ledpoint, present at SICAM 2025, sits at the heart of these trends, developing products like neon flex that meet demands for uniformity, flexibility, and ease of installation—while reducing unnecessary materials like profiles.
Success case studies: from residential to contract
Let’s examine two real-world applications demonstrating the effectiveness of these solutions.
Case study 1: luxury home kitchen
Challenge: light the upper crown recess of kitchen wall cabinets and the under-cabinet recess in the work zone—without visible sources—creating a warm ambiance for dinners and functional task lighting for cooking.
Solution: use Ledpoint COB LED strip at 3000K with high CRI in the upper recess (ambient lighting) and IP65 neon flex at 4000K under cabinets (task lighting). Both controlled by a single dimmable system.
Result: the upper light line—perfectly uniform—wraps the room in welcoming glow. The under-cabinet light, powerful and shadow-free, perfectly illuminates the work surface. The absence of profiles simplified installation in tight spaces and preserved clean design lines.
Case study 2: hotel reception (contract)
Challenge: highlight a solid wood reception desk, creating an inviting yet professional focal point—without invasive structural changes.
Solution: create a recess along the underside of the desk and install RGBW neon flex inside.
Result: by day, neutral white light enhances the wood grain. By night, the reception shifts to warm, enveloping tones or changes color for special events. The thin, continuous “light box” effect gives the hotel a high-tech, refined image.
Maintenance and troubleshooting
A quality LED installation requires little maintenance, but simple precautions ensure longevity. Cleaning is essential: dust accumulating in recesses and on strip/neon surfaces can reduce light output by up to 20%. Always disconnect power before any operation. To clean, use compressed air to remove dry dust, or a soft, dry cloth. Never spray liquids directly onto non-waterproof (IP20) LED strips. For IP65 neon flex or strips, a lightly damp cloth is acceptable.
Other preventive maintenance tips include: avoiding mechanical stress (excessive/repeated bending), not exceeding recommended series-run lengths to prevent overheating, and ensuring power supplies have adequate ventilation. Periodically check adhesive integrity—especially in environments with large temperature swings. For critical installations, an annual inspection of all electrical connections is good practice.
Diagnosing and solving common issues
Quick guide to diagnosing and fixing common recess lighting problems.
Issue: LED strip or neon flex doesn’t light up.
Diagnosis: check if the power supply is plugged in and on. Verify output voltage (e.g., 24V) with a multimeter. Ensure all connectors are fully seated and cables aren’t damaged.
Solution: replace faulty power supply, reseat connections, or replace connector.
Issue: only part of the strip lights up.
Diagnosis: indicates a circuit break—loose connector, cold solder joint, or cutting outside designated points (damaging the circuit).
Solution: isolate and replace the faulty segment. Always cut only at manufacturer-indicated points to prevent this.
Issue: light is dim or flickers toward the strip’s end.
Diagnosis: voltage drop. Strip is too long for the power supply, or wiring gauge is too thin, causing power loss along the run.
Solution: power the strip from both ends (dual feed) or split the installation into multiple circuits, each with its own centrally located power supply.
Issue: adhesive fails and strip detaches.
Diagnosis: poor surface prep, excessive humidity/heat, or low-quality adhesive.
Solution: with quality 3M adhesive (like Ledpoint’s), failure is rare if the surface is properly prepared. If detachment occurs, clean both surfaces with alcohol and reapply—optionally reinforcing with hot glue at invisible critical points.
Future outlook and innovations
The future of integrated lighting in cabinet recesses is tightly linked to technological innovation. Key emerging trends include:
Micro-LED and mini-LED: technologies that further shrink individual emitters, enabling ultra-high densities and thus absolute light uniformity—even without diffusers. This will allow for even thinner, more discreet recesses.
Flexible OLEDs: organic LEDs naturally produce diffuse light, are ultra-thin, and can be flexible. In the future, they could be applied like “luminous wallpaper” inside recesses, opening entirely new design possibilities.
Sensor and IoT integration: LED strips will become full smart systems. Beyond emitting light, they may embed occupancy, air quality, humidity, or microphone sensors for voice control—turning the simple illuminated recess into an active smart home interface.
Conductive materials and wireless power: research into conductive paints or films could lead to fully wireless power and control systems, eliminating physical wiring for strips—further simplifying installation and space redesign.
Final tips for designers and installers
For professionals approaching cabinet recess lighting, here are key takeaways to ensure top results:
Never compromise on quality: always choose reliable suppliers who guarantee real technical specs (lumens, CRI, efficiency) and quality components. Initial savings on cheap products always backfire in performance, lifespan, and safety.
Design with light: integrate lighting concepts from the earliest furniture or interior design stages. Define recess dimensions and profiles based on the chosen LED product.
Always test first: before final installation, test the product, color temperature, and intensity on-site. A temporary sample strip can prevent major disappointments.
Plan for maintenance: design installations so LED strips or neon flex can be inspected or replaced without dismantling the entire cabinet. Ensure reasonable access.
Keep learning: the LED lighting field evolves rapidly. Attend trade shows like SICAM, follow technical blogs from reputable companies, and deepen knowledge of topics like lux calculation or color consistency (MacAdam steps)—investments that distinguish true professionals.
Lighting cabinet recesses with today’s LED technologies is no longer exclusive to specialists—it’s accessible to designers, installers, and enthusiasts equipped with the right tools. By combining the aesthetic power of indirect light, the efficiency of modern technology, and the practicality of products like neon flex, any space can be transformed—significantly and durably elevating its comfort, functionality, and value.